
In This Article
This post contains affiliate links. As an Amazon Associate, I earn from qualifying purchases at no extra cost to you.
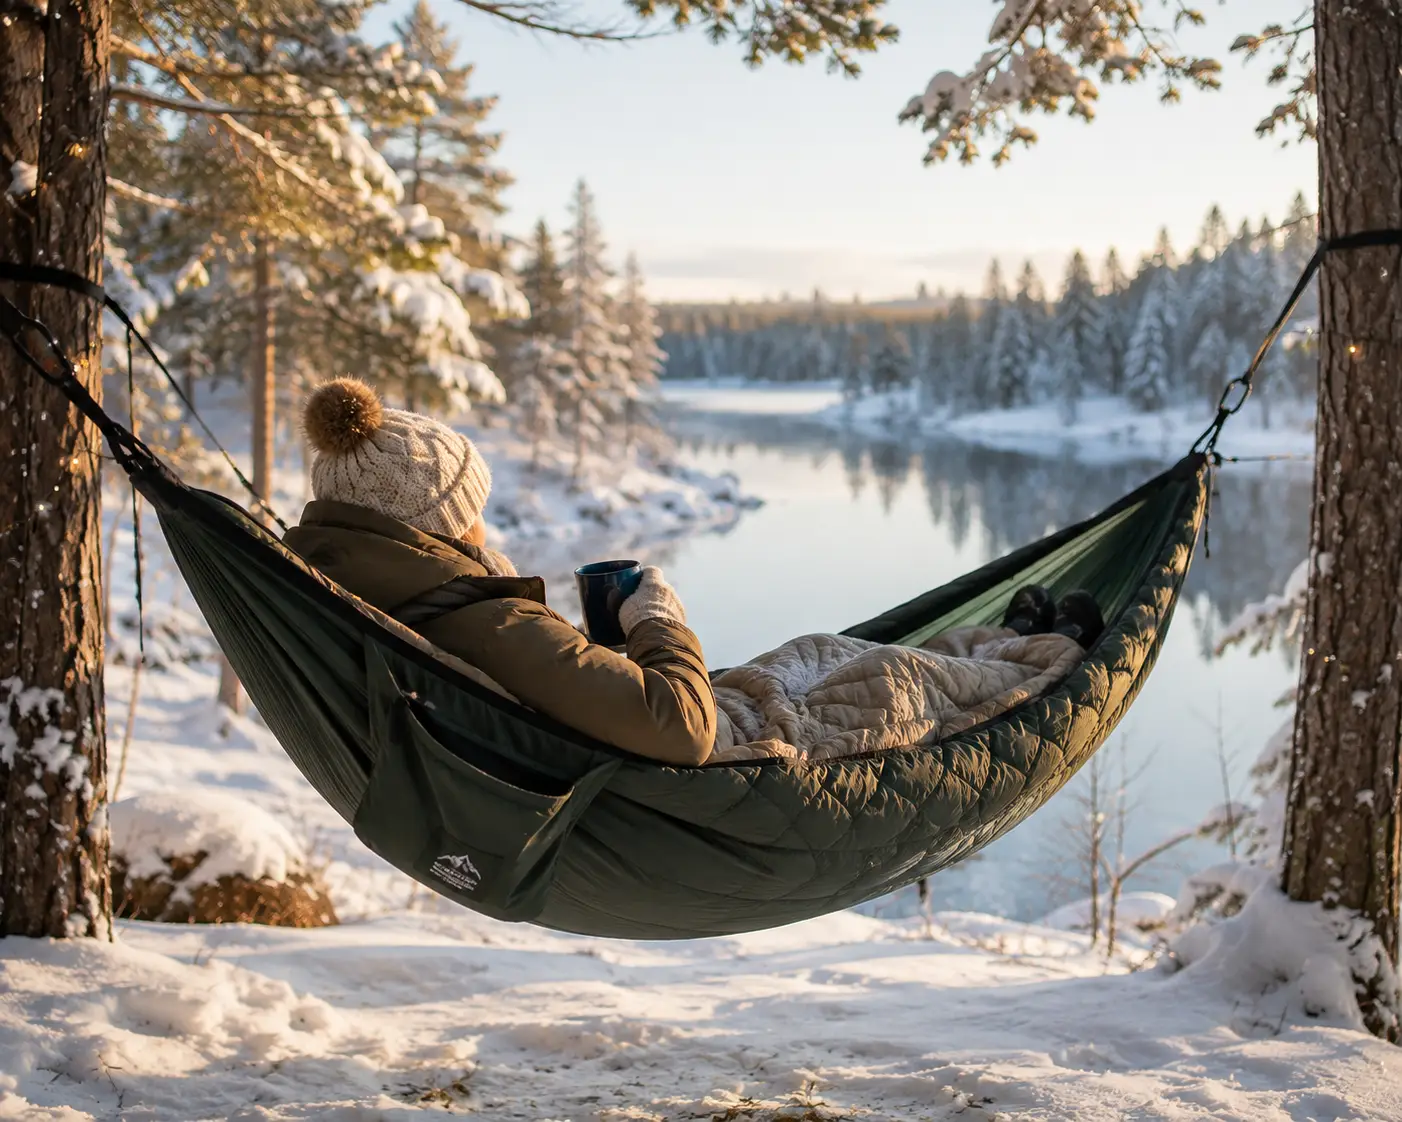
A winter hammock isn’t just a summer hammock you drag out in December — it’s a completely different sleep system, and treating it like the same piece of gear is how people end up shivering at 2 a.m. wondering why their “warm” sleeping bag isn’t cutting it. The problem is physics, not willpower: when you lie in a hammock, your body weight compresses whatever insulation is underneath you until it stops trapping air, which means the exact same sleeping bag that keeps you toasty on the ground can leave you dangerously cold suspended between two trees. A proper winter hammock setup solves this with underquilts, topquilts, and windproof shells designed specifically to work with — not against — the way a hammock hangs.
This guide walks through seven real, currently available systems that cover every budget, from a $25 entry-level double hammock you’ll want to pair with future upgrades, to a full expedition-grade shelter built for sub-freezing nights. Along the way, you’ll get honest analysis of what each product’s specs actually mean for your comfort, a breakdown of how winter hammock camping stacks up against pitching a tent on frozen ground, and a practical setup guide so your first cold-weather hang doesn’t turn into a rescue story. Whether you’re extending your three-season backpacking habit into November or planning a dedicated winter expedition, you’ll walk away knowing exactly what gear matches your target temperature range.
Winter Hammock at a Glance: Quick Comparison
| Product | Temp Rating | Price Range | Best For |
|---|---|---|---|
| Wise Owl Outfitters Camping Hammock | N/A (needs add-ons) | around $25–$40 | First-time buyers on a tight budget |
| ENO DoubleNest Hammock | N/A (needs add-ons) | around $70–$90 | Reliable all-season base hammock |
| onewind Hammock Underquilt and Topquilt Winter Combo | roughly 10–30°F | between $130 and $170 | Dedicated sub-freezing insulation |
| Hennessy Hammock Explorer Deluxe with SuperShelter | roughly 20–35°F (system-dependent) | between $280 and $330 | All-in-one expedition shelter |
A quick look at this table tells the real story: hammocks and insulation are usually sold separately, and the temperature rating that matters most belongs to the underquilt/topquilt system, not the hammock body itself. The Wise Owl Outfitters Camping Hammock and ENO DoubleNest Hammock are excellent bases, but neither is winter-ready until you add insulation — budget for that from day one rather than as an afterthought. If you’d rather skip the shopping-cart puzzle entirely, the Hennessy Hammock Explorer Deluxe with SuperShelter bundles everything into one system, at a price that reflects that convenience.
💬 Ready to build your winter hammock kit? Check the current price on any pick above before your next cold-weather trip!
Top 7 Winter Hammocks and Cold-Weather Systems: Expert Picks
We researched real specs, verified current availability on amazon.com, and cross-referenced aggregated customer sentiment for each of these seven picks. Coverage spans entry-level hammocks that need companion insulation, integrated underquilt/topquilt combos, and one full hot-tent system built for genuinely extreme cold.
1. Wise Owl Outfitters Camping Hammock — best budget entry point
This double-wide hammock is the gateway drug of hammock camping, and for good reason: it’s cheap enough that you won’t feel bad experimenting with your first underquilt setup on top of it. The body is built from 210T parachute nylon with triple-interlock stitching, rated to a 500-pound weight capacity, and it ships with tree-friendly straps and carabiners so you’re not scrambling for accessories on your first trip. None of that insulates you from cold air, though — what it does give you is a reliable, well-made platform to build a winter system around without sinking $150 into a hammock body before you know if hammock camping is even for you.
What most first-time buyers overlook is that this hammock’s biggest strength — its low price — is also exactly why it makes sense as a starter platform rather than a long-term winter rig. Budget-conscious campers and backyard-to-backcountry beginners get the most value here, since the money saved on the hammock itself can go straight toward a proper underquilt, which matters far more for warmth than the hammock fabric does. Reviews consistently report that the stitching and straps hold up well over years of repeated use, and this model has become one of Amazon’s best-selling camping hammocks, with tens of thousands of ratings averaging around 4.7 stars. A recurring theme in that feedback is genuine surprise at how sturdy a budget hammock can feel.
Pros:
- ✅ Extremely low cost of entry for testing hammock camping
- ✅ 500-lb capacity with triple-stitched, durable 210T nylon
- ✅ Compact pack size that barely takes up backpack space
Cons:
- ❌ No built-in insulation, bug net, or rain protection
- ❌ Single-layer fabric means no sleeve for a pad or double-layer setup
Priced around $25–$40 depending on color and current promotions, this is one of the best value-for-money starter hammocks on the market — just budget separately for the insulation that actually makes winter camping possible.
2. ENO DoubleNest Hammock — most trusted all-rounder
The ENO DoubleNest Hammock earned an REI Co-op Editors’ Choice award, and once you look at the build quality, it’s easy to see why: 70-denier high-tenacity nylon taffeta, aluminum wiregate carabiners, and a triple-stitched design rated to 400 pounds, all packed into a stuff sack roughly the size of a grapefruit. In practice, that denier count means the fabric resists abrasion and pilling far better than the ultra-thin nylons used in budget hammocks, which matters when you’re compressing it against frozen bark or packing it wet after a snowy night.
What sets this apart from the budget option above is the compatibility ecosystem: ENO makes an entire lineup of underquilts, topquilts, and bug nets engineered to click directly onto the DoubleNest’s structure, so upgrading your warmth later is plug-and-play rather than a fabric-matching guessing game. That makes it the smarter buy for anyone who already knows they’ll be hammock camping across multiple seasons, not just testing the waters. Reviews frequently mention the DoubleNest’s roomy interior — enough for one person to lie on the diagonal comfortably, or two in a pinch — and its fast-drying fabric after dew-heavy mornings.
Pros:
- ✅ REI Editors’ Choice build quality and 400-lb capacity
- ✅ Broad ecosystem of matching ENO underquilts and topquilts
- ✅ Packs down to about 6 by 5 inches for minimal bulk
Cons:
- ❌ Requires separate underquilt purchase for any winter use
- ❌ Aluminum carabiners add a bit more weight than ultralight hooks
Expect to pay in the $70–$90 range, which puts it solidly mid-pack — a fair trade for a hammock designed to grow with your gear over time.
3. ENO Ember UnderQuilt — shoulder-season warmth upgrade
Once you own an ENO hammock, the ENO Ember UnderQuilt is the natural next purchase, and it illustrates a critical winter hammock concept: insulation hung underneath the hammock (rather than inside it) never gets compressed by your body weight, so it retains its full loft — and its full warmth — all night long. The Ember uses two layers of recycled synthetic insulation in an offset quilted construction specifically designed to eliminate cold spots where seams would otherwise let heat escape.
Rated to 40–60°F, this isn’t a deep-winter piece on its own — think of it as your shoulder-season workhorse that stretches your camping calendar into fall and early spring. The honest takeaway from comparing this against heavier winter-specific underquilts (like pick #5 below) is that the Ember trades maximum warmth for lighter weight and easier packing, which makes it the better choice if most of your trips fall in the 40s and 50s rather than well below freezing. Reviews highlight the adjustable shock-cord suspension as genuinely faster to dial in than older strap-based underquilts, and several buyers specifically mention pairing it with a topquilt to stretch the effective range down toward freezing.
Pros:
- ✅ Offset quilted design specifically eliminates cold-spot seams
- ✅ Adjustable shock-cord suspension sets up in minutes
- ✅ Compatible with virtually every ENO hammock except SkyLoft
Cons:
- ❌ 40–60°F rating alone isn’t enough for true winter nights
- ❌ Needs a topquilt or sleeping bag layered on top for deep cold
Typically priced between $110 and $130, it’s a smart mid-tier investment for anyone extending a three-season habit rather than planning sub-freezing expeditions.
4. OneTigris KOMPOUND Camping Hammock + Hideout Underquilt Combo — affordable all-in-one bundle
If the idea of buying a hammock and underquilt as two separate purchases feels like a hassle, the OneTigris KOMPOUND Camping Hammock + Hideout Underquilt Combo bundles both in one listing at a price that undercuts buying ENO components separately. The hammock itself includes a zippable internal cover that closes off the top — a detail that does double duty by trapping warmth around your blanket and reducing the condensation frost that tends to form on sleeping bags in cold, humid air.
The Hideout underquilt uses a 210T Terylene shell over a 300T polyester pongee lining with roughly 700 grams of polyester cotton fill, and it’s cut long and wide (9.2 by 4 feet) to wrap fully around the sides and bottom of a standard hammock — the wrap-around fit is what actually prevents the notorious “cold butt syndrome” that plagues hammock campers who rely on a pad alone. What most buyers overlook with combo kits like this is that synthetic fill, unlike down, keeps most of its insulating power even when damp, which matters a lot in snow-adjacent camping where morning condensation is nearly guaranteed. Aggregated reviews describe the combo as a genuinely functional starter system for winter hangs, with the internal cover getting particular praise for cutting down on drafts around the shoulders.
Pros:
- ✅ Hammock and underquilt sold together at a bundled discount
- ✅ Zippable internal cover reduces drafts and condensation frost
- ✅ Synthetic fill retains warmth even when damp
Cons:
- ❌ 40–68°F comfort range still falls short of hard freezes
- ❌ YKK zippers on the internal cover need gentle handling in the cold
The combo typically lands around $70–$100, making it one of the best value-for-money bundles for campers who want a complete kit without piecing one together themselves.
5. onewind Hammock Underquilt and Topquilt Winter Combo — true sub-freezing insulation system
This is where the lineup shifts from “extended shoulder season” to genuinely built for winter. The onewind Hammock Underquilt and Topquilt Winter Combo pairs an 82-by-52-inch underquilt with an 85-by-54-inch topquilt, each individually rated to roughly 30–50°F — but layered together as designed, the combo is built to handle nights in the 10–30°F range, which covers most winter camping outside of extreme alpine conditions.
The practical engineering detail worth understanding here is that the underquilt handles heat loss to the air below you (the coldest, most persistent threat in a hammock), while the topquilt seals the gap a sleeping bag alone would leave around your shoulders and sides. Both pieces use a lightweight 1.1-ounce, 20-denier recycled nylon shell that’s windproof and water-resistant against light precipitation, so the whole system stays compact despite the added warmth. Based on comparing the spec sheet against ENO’s Ember, the meaningful trade-off is weight and bulk: this combo runs heavier and packs larger, but that’s the honest cost of the extra 20–30 degrees of usable range. Reviews commonly describe the combo as the point where buyers stopped worrying about frost on the hammock body and started actually looking forward to winter trips, though several note it’s worth double-checking the specific listing since onewind periodically updates the suspension hardware.
Pros:
- ✅ Combined system rated for genuinely sub-freezing 10–30°F nights
- ✅ Windproof, water-resistant 20D nylon shell on both pieces
- ✅ Underquilt-plus-topquilt design eliminates gaps a bag alone leaves
Cons:
- ❌ Noticeably heavier and bulkier than shoulder-season-only underquilts
- ❌ Two-piece system takes longer to dial in than a single quilt
Expect to pay between $130 and $170 for the combo — a fair price given it replaces what would otherwise be two separate purchases from a specialty ultralight brand.
6. Hennessy Hammock Explorer Deluxe with SuperShelter — expedition-proven 4-season shelter
The Hennessy Hammock Explorer Deluxe with SuperShelter is the closest thing in this lineup to a complete, out-of-the-box winter shelter rather than a hammock you accessorize over time. The Explorer Deluxe uses Hennessy’s patented asymmetrical shape (U.S. Patent 6,865,757) with a structural ridgeline, designed to hold your body on a diagonal lay that keeps you flatter than a traditional gathered-end hammock — a detail that matters in winter because a flatter lay means less fabric pressed directly against your back losing heat.
The SuperShelter add-on is what pushes this into true four-season territory: a waterproof, windproof silnylon UnderCover creates a sealed air pocket beneath the hammock, and a contoured foam UnderPad slides between the layers to trap that air without adding the bulk of a full underquilt. This is a fundamentally different approach to insulation than quilts — instead of loft-based warmth hanging outside the hammock, it’s a dead-air-space system integrated into the hammock’s own double-layer construction, and reviewers who’ve weathered actual snowstorms report the windproof bottom “cuts the wind chill perfectly” even in the depths of winter. Long-term owners describe pushing the system down into the 30s comfortably and into the 20s or lower with added insulating layers, though as with any gear, individual cold tolerance varies. Designed for campers up to 300 pounds and 7 feet tall, it’s built with genuine headroom for larger users who’ve struggled to fit comfortably in narrower hammocks.
Pros:
- ✅ Patented asymmetrical shape gives a flatter, more supportive lay
- ✅ SuperShelter’s sealed air-pocket design blocks wind chill effectively
- ✅ Rated for campers up to 300 lbs and 7 feet tall
Cons:
- ❌ Highest total price point in this lineup once bundled
- ❌ Setup has a steeper learning curve than gathered-end hammocks
Between the hammock and SuperShelter system, expect a combined price in the $280–$330 range — a serious investment, but one that reflects a genuinely complete winter shelter rather than a hammock plus accessories.
7. OneTigris ROCDOMUS Hot Tent with Stove Jack — wood-stove-ready for extreme cold
For campers pushing into truly extreme winter conditions — think well below freezing, multi-night basecamp trips, or bushcraft-style setups — the OneTigris ROCDOMUS Hot Tent with Stove Jack takes a completely different approach than every other pick on this list: instead of layering insulation around your body, it wraps a heated shelter around your entire hammock system. Rated to 3,000mm waterproofing and built with a stove jack compatible with most general-sized tent stoves, it converts your hang into a heated basecamp rather than an insulated sleeping bag.
This is genuinely transformative gear for the right use case rather than a universal upgrade — most weekend campers don’t need a wood-stove-compatible shelter, but for anyone doing extended winter trips where ambient temperatures make quilt-only systems risky, the ability to actually warm the air around you (rather than just trap your own body heat) is a different category of safety margin entirely. It functions equally well as a standalone hot tent, a rain tarp, or a temporary front-porch shelter, which adds versatility beyond just hammock use. Reviewers who’ve used it with a compatible stove describe genuinely comfortable nights in conditions that would be miserable in a quilt-only setup, though the consensus is clear that this is specialist gear for committed cold-weather campers rather than an entry-level pick.
Pros:
- ✅ Stove jack allows a real heat source inside the shelter
- ✅ 3,000mm waterproof rating handles heavy snow and rain
- ✅ Doubles as a standalone shelter beyond hammock use
Cons:
- ❌ Tent stove sold separately, adding to total system cost
- ❌ Overkill and unnecessarily heavy for casual or short trips
Priced around $150–$220 for the shelter alone, it’s genuinely great value for the capability it unlocks, provided you’re actually camping in conditions extreme enough to need it.
How the Top 7 Winter Hammock Systems Stack Up
| Product | Type | Approx. Price | Best For |
|---|---|---|---|
| Wise Owl Outfitters Camping Hammock | Hammock only | $25–$40 | Absolute beginners |
| ENO DoubleNest Hammock | Hammock only | $70–$90 | Multi-season upgraders |
| ENO Ember UnderQuilt | Underquilt | $110–$130 | Fall/spring warmth boost |
| OneTigris KOMPOUND + Hideout Combo | Hammock + underquilt | $70–$100 | Budget cold-weather bundle |
| onewind Underquilt + Topquilt Winter Combo | Underquilt + topquilt | $130–$170 | Genuine sub-freezing camping |
| Hennessy Explorer Deluxe + SuperShelter | Complete hammock system | $280–$330 | Expedition-grade all-in-one |
| OneTigris ROCDOMUS Hot Tent | Heated shelter | $150–$220 | Extreme cold, multi-night basecamps |
Laid out side by side, the pattern is clear: price climbs steadily as products move from “hammock only” toward “complete winter system,” and the sweet spot for most cold-weather campers sits in the middle with the onewind Underquilt + Topquilt Winter Combo or the OneTigris KOMPOUND + Hideout Combo. If you’re already committed to serious winter trips, the Hennessy Explorer Deluxe with SuperShelter or the OneTigris ROCDOMUS Hot Tent are worth the jump in price because they solve warmth at a systemic level rather than requiring you to layer and troubleshoot multiple separate pieces.
💬 One click helps other cold-weather campers find the right setup too! 😊
What Is a Winter Hammock?
A winter hammock is a hammock-based sleep system engineered — through underquilts, topquilts, or fully sealed insulated shells — to keep a camper warm in freezing or near-freezing temperatures, compensating for the fact that a hammock offers no insulation from below on its own. Unlike a standard summer hammock, it’s really a category of gear rather than a single product, spanning everything from add-on underquilts to complete expedition shelters like a hot tent.
The core challenge every winter hammock system addresses is what experienced hangers call “cold butt syndrome”: because your body weight compresses any insulation placed inside the hammock, a sleeping bag alone loses nearly all its loft — and therefore its warmth — exactly where you need it most. Solutions fall into two broad camps: quilt-based systems, which hang insulation outside the hammock body so it’s never compressed, and shell-based systems, which trap a sealed pocket of warm air using a windproof outer layer combined with a foam pad. Both approaches work; which one fits you depends on your target temperature, your budget, and how much setup complexity you’re willing to manage in the cold.
How to Choose a Winter Hammock System
Picking the right setup comes down to matching your gear to your actual coldest expected night, not the average temperature of your trip. Here’s the decision process worth working through before you buy:
- Identify your coldest realistic night. Check historical lows for your typical camping season and region, then add a 5–10 degree safety margin — gear rated exactly to the forecast leaves no room for an unexpected cold snap.
- Decide between quilt-based and shell-based insulation. Underquilt-and-topquilt combos are lighter and more packable; hot tents and SuperShelter-style systems trade weight for a genuinely warmer, more forgiving margin in extreme cold.
- Match your underquilt to your hammock brand where possible. Purpose-matched systems like ENO’s Ember hang more securely and eliminate more drafts than generic underquilts stretched over an incompatible hammock shape.
- Weigh synthetic versus down fill. Synthetic insulation, used in most of the picks above, keeps warming even when damp — a meaningful advantage in snow-heavy or humid winter conditions where down’s performance can suffer.
- Check the weight capacity against your full winter kit. Add the weight of yourself, a sleeping bag, and any pad or extra layers; winter loadouts run heavier than summer setups and can approach a hammock’s rated limit faster than expected.
- Consider your setup skill and patience in the cold. A two-piece underquilt-and-topquilt system takes longer to dial in on a freezing night than a single integrated shelter — factor that learning curve into your choice if you’re camping solo.
- Budget for the whole system, not just the hammock. As the REI hammock camping guide notes, a hammock tent setup usually bundles the accessories you need, while building your own system means budgeting separately for straps, insulation, and weather protection.
Winter Hammock vs. Ground Tent Camping
| Factor | Winter Hammock | Ground Tent |
|---|---|---|
| Insulation from cold ground | Elevated, no direct ground contact | Requires a high-R-value pad |
| Setup requirements | Needs two sturdy trees | Works on any flat, clear ground |
| Weight of full winter kit | Often lighter (no tent poles/floor) | Heavier with 4-season poles and floor |
| Wind/storm exposure | More exposed unless paired with a tarp or hot tent | Fully enclosed shell |
The table above captures why hammock campers are so enthusiastic about winter hangs, and why it isn’t automatically the better choice for everyone. Being elevated off frozen or snow-covered ground is a real advantage — you skip the constant battle against ground-level cold that plagues even well-insulated tent campers, a point echoed in REI’s guide to choosing a hammock, which notes hammock campers are “spared the discomfort of sleeping on sloped or rocky ground.” On the flip side, a hammock needs two solidly anchored trees and more open exposure to wind unless you’re using something like the ROCDOMUS hot tent, whereas a four-season tent creates a fully sealed shell almost anywhere flat. If your route runs above the treeline or through open terrain, a tent (or a hammock paired with a serious tarp) is the safer call.
Setting Up Your Winter Hammock System: A Step-by-Step Guide
Getting a winter hammock system right on your first cold-weather trip comes down to a handful of habits experienced hangers develop the hard way. Start by picking a wind-sheltered site — a stand of trees or a natural windbreak cuts wind chill dramatically more than temperature alone would suggest, and it’s worth the extra ten minutes of scouting before you commit to a spot. Hang your underquilt snugly against the hammock body with no gaps; even a one-inch sag creates a channel for cold air to slip underneath you, undoing much of the insulation’s benefit.
Layer your topquilt or sleeping bag next, making sure it seals around your shoulders rather than just draping over you — cold air pools at open gaps faster than most first-timers expect. Pitch a tarp low and tight on the windward side, angled to block driving snow without trapping condensation against the hammock body. In the first 30 days of winter hammocking, the most common mistake is under-insulating the head and feet, since both extremities lose heat fast and sit closer to the hammock’s edges where drafts concentrate; a simple beanie and an extra pair of dry socks solve most of that gap. Finally, always test a new winter setup on a mild, low-stakes night near home before committing to a genuinely cold backcountry trip — small adjustments are far easier to make from your backyard than from a frozen trailhead at midnight.
Real-World Winter Hammock Scenarios: Which Setup Fits You?
Different winter campers need genuinely different systems, and matching your profile below to a pick above will save you from over- or under-buying. A weekend car camper who wants to extend their season into crisp fall nights, camping maybe once a month in the 35–45°F range, is well served by the ENO DoubleNest Hammock paired with the ENO Ember UnderQuilt — enough warmth for shoulder-season comfort without the cost or bulk of a dedicated winter rig.
A dedicated backpacker planning multiple sub-freezing trips each winter, hiking in on their own power and needing a genuinely reliable 10–30°F system, is the ideal buyer for the onewind Underquilt and Topquilt Winter Combo — it’s the pick built specifically for that temperature band without the added weight of a hot tent. Meanwhile, a basecamp-style winter expedition group settling into one spot for several nights, especially in genuinely extreme cold, gets the most value from the OneTigris ROCDOMUS Hot Tent, since a heated shelter changes the entire safety calculus compared to insulation alone. Budget-first beginners testing whether hammock camping suits them at all should start with the Wise Owl Outfitters Camping Hammock and add insulation once they know they’ll stick with it.
Common Winter Hammock Problems and How to Solve Them
Even well-chosen gear runs into predictable snags in cold weather, and knowing the fix in advance beats troubleshooting at 20°F. Condensation buildup on the hammock’s underside is one of the most common complaints in winter hammock camping — it happens when warm, moist air from your body meets a cold outer shell, and it’s largely solved by ensuring your underquilt has a gap-free, windproof outer layer, like the water-resistant shells used on the onewind and ENO Ember picks above.
Cold spots along the shoulders or hips usually trace back to a loose-hanging underquilt rather than a lack of insulation entirely — cinching the suspension cords tighter so the quilt hugs the hammock body eliminates most of these drafts. Zippers freezing or sticking shut is a recurring issue in sub-freezing conditions; a light application of a silicone-based (not oil-based) zipper lubricant before your trip keeps most YKK zippers, like those on the OneTigris KOMPOUND, working smoothly through the cold. Finally, campers frequently underestimate how much colder wind makes a hammock feel compared to a tent, since more of the hammock’s surface area is exposed — pairing any underquilt system with a full-coverage tarp, pitched low on the windward side, closes that exposure gap significantly.
Common Mistakes to Avoid When Buying a Winter Hammock
The single biggest mistake buyers make is purchasing a hammock and underquilt from mismatched brands and assuming “universal fit” claims guarantee a snug seal — a loosely fitting underquilt from an incompatible shape leaves gaps that undercut its rated temperature significantly. A close second is buying insulation rated only slightly below your expected low temperature; gear rated exactly to freezing performs noticeably worse in actual freezing conditions than its number suggests, since manufacturer ratings often reflect survival rather than comfort thresholds.
Many first-time buyers also skip the topquilt or extra top layer entirely, assuming an underquilt alone handles winter camping — in practice, the underquilt only solves the compression problem below you, and skipping insulation above leaves a real gap in the system. Finally, don’t underestimate weight capacity: a winter loadout with a heavier sleeping bag, extra layers, and a pad can push closer to a hammock’s rated limit than campers expect, so it’s worth checking your full kit weight against the stated capacity before you buy, not after.
What to Expect: Everyday Winter Hammock Performance
On paper, a hammock rated to 10–30°F sounds like a guarantee, but real-world performance depends heavily on wind, humidity, and how snugly your insulation actually fits — the number on the label is a starting point, not a promise. Expect your first few winter hangs to run a little colder than the rating suggests simply because dialing in a snug underquilt fit takes practice; most experienced hangers report their comfort improving noticeably by their second or third cold-weather trip as they learn their own system’s quirks.
Morning condensation is close to universal in cold hammock camping, regardless of how good your gear is, since the temperature differential between your body heat and the outside air almost guarantees some moisture forms on interior surfaces — plan to air out your quilt for a few minutes each morning rather than packing it away damp. Setup and takedown also run slower in the cold; frozen fingers make fiddly buckles and shock cords genuinely harder to manage, so budgeting extra time (and a pair of thin gloves you can work in) makes the whole process noticeably less miserable.
Long-Term Cost and Maintenance of a Winter Hammock Setup
A winter hammock system is a genuinely durable investment when cared for properly, and understanding the real total cost of ownership helps put the higher-end picks above in perspective. Synthetic insulation, used across most of these products, typically holds its loft for several years of regular use with basic care — hand-washing in cold water, air-drying fully before storage, and avoiding high heat in a dryer, which can melt synthetic fibers and permanently collapse their loft.
Comparing total cost across the lineup: starting with the Wise Owl Outfitters Camping Hammock at around $30 and adding a mid-tier underquilt later brings your total investment close to the price of buying the OneTigris KOMPOUND + Hideout Combo outright, so there’s little financial penalty to starting cheap and building up. The Hennessy Explorer Deluxe with SuperShelter and the ROCDOMUS Hot Tent, by contrast, front-load the cost but eliminate the need for future upgrades if you’re committed to serious winter camping — over five years of regular use, that upfront investment often works out cheaper per trip than repeatedly buying and replacing budget gear that wasn’t built for the conditions.
Safety, Regulations, and Standards for Winter Hammock Camping
Winter hammock camping carries real cold-exposure risks that deserve the same seriousness as any other winter outdoor activity, and the products in this guide are accessories, not substitutes for basic cold-weather safety practices. The CDC’s guidance on preventing hypothermia notes that hypothermia can occur even at temperatures above 40°F if a person becomes chilled from wind, sweat, or moisture — a relevant warning for hammock campers, since damp underquilts or unexpected wind exposure can undercut a system’s rated warmth faster than most people expect.
Practical safety habits matter as much as gear specs: always camp with at least one other person or a reliable way to signal for help on genuinely cold trips, know the early signs of hypothermia (shivering, fumbling hands, confusion), and never rely on a single insulation layer without a backup plan if conditions turn colder than forecast. On the equipment side, none of the products in this guide carry consumer safety certifications specific to hammocks the way some products carry UL or CPSC listings, so weight-capacity ratings and honest aggregated review feedback remain the best signals of build quality — always inspect straps, carabiners, and stitching before every trip, especially after cold-weather use, since low temperatures can make some materials more brittle.
Features That Actually Matter (and Ones That Don’t)
Cutting through the marketing language on winter hammock listings, a handful of specs genuinely predict real-world warmth and comfort, while others are mostly noise. Temperature rating of the insulation system (not the hammock) is the single most important number — as covered throughout this guide, the hammock body itself contributes essentially nothing to warmth. Fill type (synthetic versus down) matters a lot for anyone camping in snow or humid winter air, since synthetic keeps insulating when damp, while down’s performance drops sharply.
On the other hand, denier count and fabric weight — heavily marketed on most hammock listings — matter far less for warmth than buyers assume; they primarily affect durability and pack weight, not insulation. Carabiner material (aluminum versus steel) is another spec that gets outsized attention online but makes little practical difference for most campers, since both hold well within their rated limits for typical use. Focus your comparison shopping on insulation temperature rating, fill type, and suspension design — the rest is largely secondary.
FAQ
❓ What temperature is a winter hammock rated for?
❓ Do I need an underquilt for winter hammock camping?
❓ Is hammock camping warmer or colder than tent camping?
❓ How much does a full winter hammock setup cost?
❓ Can I use a regular sleeping bag in a winter hammock?
Conclusion
Building a genuinely warm winter hammock setup comes down to understanding one core idea: the hammock itself barely matters for warmth — the insulation system wrapped around and beneath you does all the real work. Start with a reliable hammock body like the Wise Owl Outfitters Camping Hammock or the ENO DoubleNest Hammock if you’re new to the sport, then layer in insulation that actually matches your coldest expected night, whether that’s the shoulder-season ENO Ember UnderQuilt, the genuinely sub-freezing onewind Underquilt and Topquilt Winter Combo, or a fully integrated system like the Hennessy Hammock Explorer Deluxe with SuperShelter.
For campers heading into truly extreme conditions, the OneTigris ROCDOMUS Hot Tent changes the entire equation by adding real heat rather than just trapping your own. Whichever system you land on, test it close to home before you rely on it in the backcountry, budget for the whole kit rather than just the hammock, and match your gear honestly to your coldest realistic night rather than your average one. Done right, winter hammock camping offers a genuinely comfortable, elevated alternative to frozen ground — and once you’ve dialed in your system, it’s hard to go back to a tent.
✨ Don’t miss these exclusive deals! 🔍 Take your winter hammock setup to the next level with this carefully curated lineup. Click a highlighted pick to check current pricing and availability on Amazon. These picks will help you get cozy, well-insulated nights the whole camping season through!
Recommended for You
- Best Portable Hammock Stand: 7 Top Picks for 2026 (Reviewed)
- Ultralight Hammock Stand: 7 Best Picks for 2026 (Tested)
- Hammock in a Bag: 7 Best Picks for Effortless Camping (2026)
Disclaimer: This post contains affiliate links. As an Amazon Associate, I earn from qualifying purchases made through these links, at no additional cost to you.
✨ Found this article helpful? Share it with someone who needs it! 💬🤗