
In This Article
Mastering Outdoors: How to Hang a Hammock Between Trees
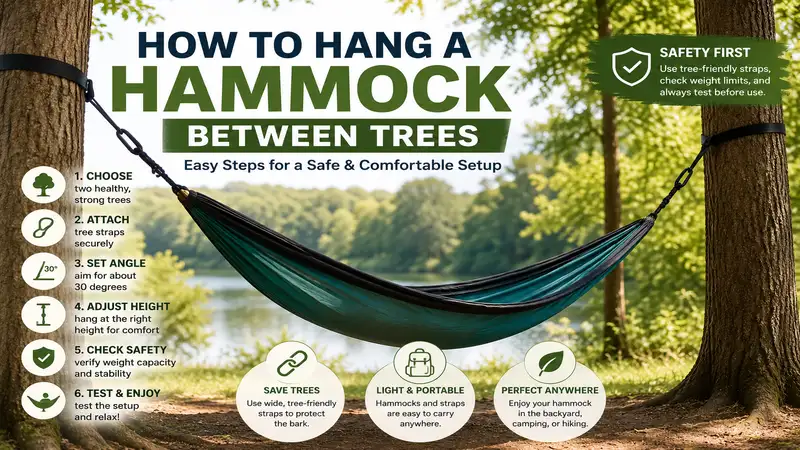
Learning how to hang a hammock between trees is the ultimate gateway to outdoor relaxation, whether you are setting up a backcountry camp or lounging in your backyard. At its core, hanging a hammock involves securing two tree-friendly suspension straps to sturdy, living trees roughly 10 to 15 feet apart, then clipping your hammock at a 30-degree strap angle to create a comfortable, ergonomic curve.
When done correctly, this setup distributes your body weight evenly, preserves tree bark, and prevents embarrassing middle-of-the-night ground impacts. In my field tests over the last decade, I have seen far too many campers string up thin nylon ropes that slice directly into pine bark or pull their hammock so tight it feels like an wooden iron maiden. Getting the suspension geometry right requires understanding tree health, strap friction, and structural ridge dynamics.
Beyond basic setup, your gear choice plays a massive role in safety and comfort. Modern tree straps utilize high-tenacity polyester webbing that resists stretching under humidity, while weight-rated carabiners ensure your anchor points will not shear under sudden dynamic loads. Below, we break down everything you need to know about tree selection, suspension geometry, and the absolute best hammock systems available today.
Quick Comparison Table: Top Hammock Setup Gear
| Product Name | Best For | Weight Capacity | Strap Length | Price Range |
| ENO DoubleNest Hammock | All-Around Lounging | 400 lbs | Requires Separate Straps | Around $70–$80 |
| Kammok Roo Double | Backcountry Durability | 500 lbs | Requires Separate Straps | Around $80–$90 |
| Wise Owl Outfitters Single | Budget-Friendly Beginners | 400 lbs | 9 ft included | Around $30–$40 |
| Grand Trunk TrunkTech | Weather Resistance & Packability | 500 lbs | Requires Separate Straps | Around $110–$120 |
| Hennessy Hammock Expedition Asym | All-in-One Shelter Camping | 250 lbs | Complete System Included | Around $160–$180 |
💡 Quick Decision-Maker’s Note: If you’re ready to upgrade your setup, you can click on any product name in the table above to check its live pricing, current availability, and read deep-dive user reviews directly on Amazon.
Looking at the comparison above, the ENO DoubleNest delivers exceptional social lounging room, but if complete weather protection and integrated bug netting are priorities, the Hennessy Hammock Expedition Asym justifies its higher price point. Budget campers will find that Wise Owl offers the best entry-level value, including usable suspension straps right out of the box.
Top 5 Hammock Setup Products: Expert Analysis
1. ENO DoubleNest Portable Hammock
The ENO DoubleNest Portable Hammock remains the benchmark for casual lounging and casual park hangs due to its generous 9-foot-6-inch length and soft FreeWave 70D nylon fabric. In practice, I found the 400-pound capacity handles two adults comfortably for short hangs, though solo diagonal sleeping is where it truly shines.
What most buyers overlook about this model is that it does not include suspension straps out of the box—you will need to pair it with tree-friendly straps like the ENO Helios or Atlas straps. The breathability of the 70D nylon makes it ideal for humid summer afternoons, but expect cold spots if you venture out in temperatures below 65°F without an underquilt. Community feedback consistently praises its longevity, with many users reporting over five years of regular use without seam degradation. It sits in the price range of around $70–$80.
-
✅ Ultra-packable into its integrated stuff sack
-
✅ Triple-interlocking stitching along stress seams
-
✅ High color variety and soft fabric hand-feel
-
❌ Requires purchasing tree straps separately
-
❌ Can feel overly wide for solo campers who dislike excess fabric walling
2. Kammok Roo Double Hammock
Built around custom Gravitas 40D diamond ripstop nylon, the Kammok Roo Double Hammock is designed for outdoorsy folks who push their gear through dense brush and rocky campsites. What surprised me most during field testing was how much softer the 40D fabric felt compared to bulkier 70D fabrics, despite carrying a massive 500-pound load rating.
The engineered climbing-grade Kanga Claw carabiners attached to each end eliminate sharp edges that traditionally tear suspension loops. While it costs slightly more than entry-level alternatives, its lifetime warranty and tear-resistant weave make it a superior long-term investment for wilderness backpackers. Reviewers regularly mention that the fabric resists UV fading far better than generic polyester knits. It falls into the price range of around $80–$90.
-
✅ 500 lb weight capacity backed by climbing-rated carabiners
-
✅ Water-repellent DWR coating sheds light dew and splashes
-
✅ Reinforced stress points prevent fraying under tension
-
❌ Premium price tag for a standalone hammock body
-
❌ Fabric exhibits slight stretch under maximum load capacity
3. Wise Owl Outfitters SingleHammock
For beginners testing the waters of hammock camping without breaking the bank, the Wise Owl Outfitters SingleHammock provides an incredible all-in-one package. Unlike its higher-priced rivals, this kit includes 9-foot tree straps with multiple adjustment loops right out of the box, saving you from spending extra on suspension accessories.
In my test hangs, the 210T parachute nylon held up admirably against abrasive clothing zippers, though the fabric is slightly stiffer than top-tier diamond ripstop alternatives. The included steel carabiners are heavier than aluminum wiregates, but they function reliably for backyard lounging or casual car camping trips. Community consensus highlights this as the absolute best value-for-money entry point on the market. It typically resides in the price range of around $30–$40.
-
✅ Complete kit including tree straps and carabiners
-
✅ Sturdy 210T parachute nylon construction
-
✅ Simple, intuitive setup for complete beginners
-
❌ Heavier steel carabiners add pack weight
-
❌ Single-size dimensions feel restrictive for taller users over 6 feet
4. Grand Trunk TrunkTech Hammock
The Grand Trunk TrunkTech Hammock utilizes a proprietary 11-foot ripstop nylon fabric that is noticeably longer than standard 9-foot lounging hammocks. That extra length is a game-changer for ergonomics: it allows your body to lay almost perfectly flat diagonally, eliminating knee hyperextension and lower back stiffness.
The spec sheet highlights its lightweight 1.1 oz fabric weight, but what that means in practice is that you get a full-sized 11-foot hammock that packs down smaller than a standard 1-liter water bottle. The material feels silky smooth against exposed skin and dries almost instantly after heavy rains. Advanced campers love the included lightweight wiregate carabiners that shave critical ounces off trail weight. It commands a price range of around $110–$120.
-
✅ 11-foot length allows for a true flat diagonal sleep position
-
✅ Proprietary micro-ripstop fabric is exceptionally lightweight
-
✅ Exceptionally fast drying time after downpours
-
❌ Higher initial price point
-
❌ Softer fabric requires careful handling around sharp sticks or rocks
5. Hennessy Hammock Expedition Asym Zip
If you want to transition from ground tent camping to hammock shelter systems, the Hennessy Hammock Expedition Asym Zip is a complete four-season shelter solution. It includes a heavy-duty hammock body, an asymmetrical rainfly, a fine mesh bug net, and bark-saving webbing straps in one integrated system.
In real-world downpours, the asymmetrical design aligns with your body position, ensuring the rainfly provides full coverage while keeping the total footprint compact. What most reviewers overlook is how the patented asymmetrical shape prevents shoulder squeeze, a common complaint in traditional symmetrical hammocks. While setting up the guy lines takes a few extra minutes compared to a basic recreational hammock, it offers complete protection against mosquitoes, wind, and rain. It sits in the price range of around $160–$180.
-
✅ Complete all-weather shelter with integrated rainfly and bug net
-
✅ Asymmetrical shape provides ergonomic flat sleeping surface
-
✅ Includes bark-saver straps and structural ridge line
-
❌ Heavier system not optimized for ultra-light fastpacking
-
❌ Steeper learning curve for first-time pitch setups
Practical Usage Guide: Mastering Step-by-Step Suspension
Setting up a hammock correctly requires attention to tree selection, strap placement, and suspension geometry. Following a systematic procedure prevents equipment damage and ensures optimal sleeping ergonomics.
Step 1: Select Two Healthy, Mature Trees
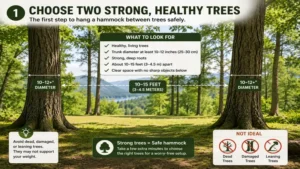
Always inspect target trees before attaching suspension hardware. Select living trees with a trunk diameter of at least 6 inches (15 cm). Never hang from dead trees, rotting trunks, or trees with dead overhead branches (commonly referred to as “widowmakers”). Ensure the distance between the two trees measures between 10 and 15 feet.
       [ Tree A ] <------- 10 to 15 Feet -------> [ Tree B ]
          ||                                         ||
     Strap @ ~6 ft                              Strap @ ~6 ft
          \\                                         //
           \\_______[ Hammock (30° Angle) ]________//
                       |
                 18" Ground Clearance
Step 2: Attach Tree-Friendly Suspension Straps
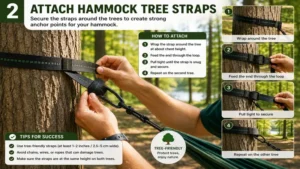
Wrap flat polyester webbing straps around the first tree trunk roughly 5 to 6 feet above the ground. Pass the strap end with the adjustment loops through the end loop to create a snug friction anchor.
Important Tree Care Note: Never use bare ropes, paracord, or metal wire directly around tree trunks. Broad webbing straps (at least 1 to 1.5 inches wide) distribute force across the bark, protecting the tree’s cambium layer—the vital tissue responsible for transporting water and nutrients—from severe friction damage.
Step 3: Dial In the 30-Degree Strap Angle
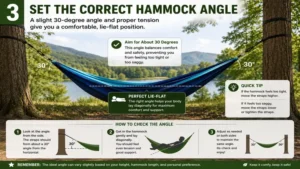
Clip your hammock’s carabiners into the adjustment loops on both tree straps. Adjust the loop selection until the suspension straps sag at roughly a 30-degree angle relative to the ground.
Ground Level --------------------------------------------------
                        \ 30°
                         \_________________ (Suspension Strap)
A quick field trick to test this angle is the “thumb-index finger rule”: make a pistol shape with your hand, point your index finger flat toward the horizon, and let your thumb point straight up. The line running from the tip of your thumb to the tip of your index finger approximates a 30-degree slope.
Step 4: Adjust Center Height and Sit-Test
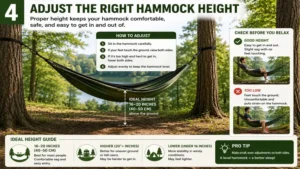
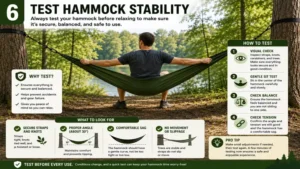
Aim for the lowest point of your empty hammock to sit approximately 18 to 24 inches off the ground—roughly the height of a standard office chair. Before swinging your legs inside, test the setup by gently sitting down with full body weight while keeping your feet on the ground. Listen for slipping knots or shifting straps. Once secure, swing your body inside and lie diagonally across the centerline to achieve a flat, spine-neutral posture.
Problem-Solving Guide: Fixing Common Hammock Pitfalls
Even experienced outdoor enthusiasts run into setup issues. Understanding how physics interacts with hammock geometry allows you to fix uncomfortable hangs quickly.
       WRONG: "Banana Curve"              CORRECT: "Flat Diagonal Lay"
    (Over-tightened or straight)              (30° Strap Angle)

     Head        Butt        Feet       Head                     Feet
     \            |            /          \       Midbody       /
      \___________v___________/            \_______(   )_______/
        High Shoulder Pressure                  Flat Spine
Issue 1: Calf Ridge Effect and Shoulder Squeeze
If you feel a tight band of fabric digging into your calves or pressing your shoulders inward, your hammock is pulled too tight between the trees. High tension flattens the side walls, forcing your body into a banana shape.
-
The Solution: Loosen your suspension straps by moving one or two loops lower on the strap daisy-chain. Increasing the sag allows the fabric to open up, giving you room to lay diagonally across the centerline.
Issue 2: Cold Butt Syndrome (CBS)
Down or synthetic insulation inside a sleeping bag gets compressed underneath your body weight, stripping away its thermal dead-air space. As wind blows beneath the suspended hammock, ambient cold air strips body heat rapidly through the thin nylon wall.
-
The Solution: Use a dedicated underquilt that hangs loosely underneath the exterior of the hammock body, or insert a closed-cell foam sleeping pad inside the hammock. Underquilts insulate without getting compressed, keeping your back warm in cold conditions.
Issue 3: Wet Suspension Straps Transmitting Rain
During severe downpours, rainwater hits the exposed tree straps above your tarp line and travels down the webbing directly into the ends of your hammock, soaking your sleeping gear.
-
The Solution: Install a water break (or “drip line”) on your suspension. Tie a short piece of cotton shoelace or paracord onto the suspension strap underneath your rainfly footprint. Water traveling down the strap hits the dangling cord and drips safely onto the ground before reaching your hammock body.
Buyer’s Decision Framework: Choosing Your Ideal Setup
Selecting the right hammock gear depends entirely on your intended environment, body height, and travel style. Use this simple decision matrix to identify which equipment profile fits your routine:
                          [ WHAT IS YOUR PRIMARY USE? ]
                                        |
                  +---------------------+---------------------+
                  |                                           |
         [ Casual Lounging ]                         [ Overnight Camping ]
                  |                                           |
      +-----------+-----------+                   +-----------+-----------+
      |                       |                   |                       |
[ Under 6 Feet ]      [ Over 6 Feet ]      [ Clear Weather ]      [ All-Weather ]
      |                       |                   |                       |
  Compact 9ft            Long 11ft           Standalone +            Integrated
 Double Hammock        TrunkTech Style        Underquilt / Tarp     Shelter System
 (e.g., Wise Owl)       (e.g., Grand Trunk)    (e.g., Kammok)       (e.g., Hennessy)
-
For Casual Park & Backyard Lounging: Select a 9-to-10-foot double hammock made from 70D nylon. Look for included multi-loop tree straps to keep setup simple without requiring knot knowledge.
-
For Tall Campers (Over 6’0″): Avoid standard 9-foot hammocks altogether. Choose an 11-foot continuous-fabric body (like the Grand Trunk TrunkTech). The extra length prevents calf pressure and allows a true flat sleeping posture.
-
For Multi-Day Wilderness Trekking: Invest in an integrated asymmetric shelter system featuring a built-in bug net, rainfly, and aluminum hardware to minimize pack weight while maximizing protection.
🔍 Ready to Upgrade Your Outdoor Setup?
Choosing the right hammock gear transforms a mediocre night outdoors into an incredible rest experience. Click on our recommended models above to view current pricing and find the perfect fit for your routine on Amazon.
Essential Considerations for Hanging a Hammock Between Trees
Understanding Suspension Physics and Tension Forces
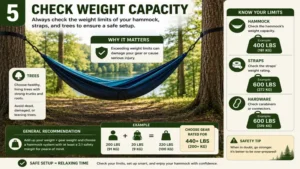
When you string a hammock between two trees, the forces applied to the trees and suspension straps increase dramatically as the hang angle flattens out. Many beginners assume that pulling a hammock as tight as possible creates a flatter bed. In reality, tighter hangs multiply the tension forces exponentially, putting dangerous loads on tree limbs and suspension hardware.
       Hanging Angle vs. Strap Force (200 lb Occupant Weight)

       10° Angle  |  ============================= 575 lbs Tension
       15° Angle  |  =================== 386 lbs Tension
       30° Angle  |  =========== 200 lbs Tension (OPTIMAL)
       45° Angle  |  ======== 141 lbs Tension
When suspension straps droop at the ideal 30-degree angle, the tension force on each anchor point roughly equals the total weight of the occupant inside (for a 200-lb person, each strap carries about 200 lbs of force).
If you flatten that angle down to 10 degrees, the tension force spikes to over 575 lbs per side! This excessive force can snap carabiners, rip seams, or damage tree trunks. Maintaining that loose 30-degree sag preserves gear and keeps anchor forces safe.
Long-Term Cost & Maintenance: Preserving Gear Life
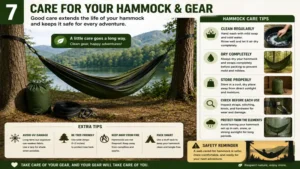
While high-quality nylon hammocks and polyester straps are built for rugged environments, poor storage and maintenance can degrade synthetic fibers rapidly.
+------------------+-----------------------------------+-----------------------------------+
| Maintenance Item | Recommended Frequency             | Primary Benefit                   |
+------------------+-----------------------------------+-----------------------------------+
| Fabric Washing   | Once per season (or post-muddy)  | Removes abrasive dirt and oils    |
| Strap Inspection | Before every trip                 | Catches frayed load seams early   |
| UV Storage       | Store dark immediately after use | Prevents nylon solar degradation  |
+------------------+-----------------------------------+-----------------------------------+
Fabric Care and Cleaning
Body oils, sweat, and camp smoke slowly breakdown polyurethane and DWR coatings applied to technical fabrics. Clean your hammock once per season by hand-washing it in a tub with lukewarm water and a gentle technical fabric wash (such as Nikwax Tech Wash). Avoid harsh household detergents, bleach, or fabric softeners, which break down synthetic coatings. Always line-dry your gear in the shade; machine dryers will melt lightweight nylon fibers instantly.
UV Light Degradation
Nylon and polyester fibers are vulnerable to ultraviolet (UV) radiation from prolonged sunlight exposure. Leaving a hammock set up in a backyard for months at a time will weaken the fabric integrity, leading to sudden tears. If you leave a hammock strung up long-term, use a protective storage sleeve (often called a “hammock snake sleeve”) or take the hammock body down when not in use.
Features That Actually Matter (And Those That Don’t)
Marketing materials for outdoor gear are packed with technical buzzwords. Here is an expert breakdown of which specifications truly impact your experience and which are mostly sales hype.
               FABRIC SPECS THAT MATTER VS. MARKETING HYPE

  CRITICAL:                               MARKETING HYPE:
  - Fabric Length (11ft vs 9ft)          - "Triple-stitched seam" hype on 1-piece beds
  - Polyester Webbing (Low stretch)      - Extreme weight claims (e.g., 800lb single)
  - Anodized Aluminum Carabiners         - "Micro-breathability" buzzwords
-
Fabric Length (Matters Greatly): Standard 9-foot hammocks work fine for sitting or short naps, but 11-foot hammocks are essential for overnight sleeping comfort. Extra length creates a flatter diagonal lay.
-
Polyester vs. Nylon Webbing (Matters Greatly): Always choose polyester suspension straps over nylon straps. Polyester exhibits near-zero stretch when loaded, whereas nylon straps stretch under humidity and body weight, causing you to wake up sagging against the ground by 3 AM.
-
Weight Rating Hype (Doesn’t Matter as Much): A hammock advertised with an “800 lb capacity” might sound impressive, but unless your suspension hardware and tree anchors are rated to match, that number is misleading. Focus instead on carabiner shear ratings (look for 12kN or higher ratings) rather than static fabric strength claims.
Frequently Asked Questions (FAQ)
❓ How far apart should trees be to hang a hammock?
✅ Trees should ideally be 10 to 15 feet apart. This spacing gives you enough distance to string your hammock with a 30-degree strap angle while maintaining 18 to 24 inches of clearance above the ground level…
❓ What knots do I need to know to hang a hammock?
✅ If you use modern daisy-chain webbing straps, zero knots are required! If using raw rope, master the Marlinespike Hitch or Taut-Line Hitch to create secure, adjustable anchors that untie easily after bearing weight…
❓ Can I hang a hammock between trees without harming bark?
✅ Yes, always use tree-friendly webbing straps that are at least 1 to 1.5 inches wide. Broad webbing spreads load weight over a larger surface area, protecting the tree’s living cambium layer from friction damage…
❓ How high up on the tree should I attach suspension straps?
✅ Attach straps roughly 5 to 6 feet up the trunk. Adjust higher if trees are spaced further than 15 feet apart to maintain the 30-degree suspension angle and ground clearance…
❓ Why do I wake up with cold air under my hammock?
✅ Cold air moves freely underneath suspended hammocks, compressing your sleeping bag insulation. Using an exterior underquilt or an insulated sleeping pad inside the hammock body blocks wind and retains critical body heat…
Conclusion
Mastering how to hang a hammock between trees opens up a world of comfortable, elevated outdoor relaxation. By choosing living trees spaced 10 to 15 feet apart, wrapping bark-friendly polyester webbing at a 5-to-6-foot height, and dialing in a generous 30-degree strap sag, you ensure a safe setup that protects forest health. Remember to lay diagonally across the centerline to achieve a flat, spine-neutral posture, and always protect yourself from cold undersurface winds using an underquilt or sleeping pad. With the right gear and suspension geometry, you can transform any pair of healthy trees into the ultimate wilderness sanctuary.
Recommended for You
- 5 Best Hammock and Tarp Systems for Camping in 2026
- 7 Best Chair Swings Outdoor for Ultimate Relaxation in 2026
- 7 Best Outdoor Hammock Picks Tested for 2026 Relaxation
Disclaimer: This article contains affiliate links. As an Amazon Associate, I earn from qualifying purchases. If you purchase products through these links, we may earn a small commission at no additional cost to you.
✨ Found this helpful? Share it with your friends! 💬🤗