
In This Article
What Is a Hammock Camping Setup?
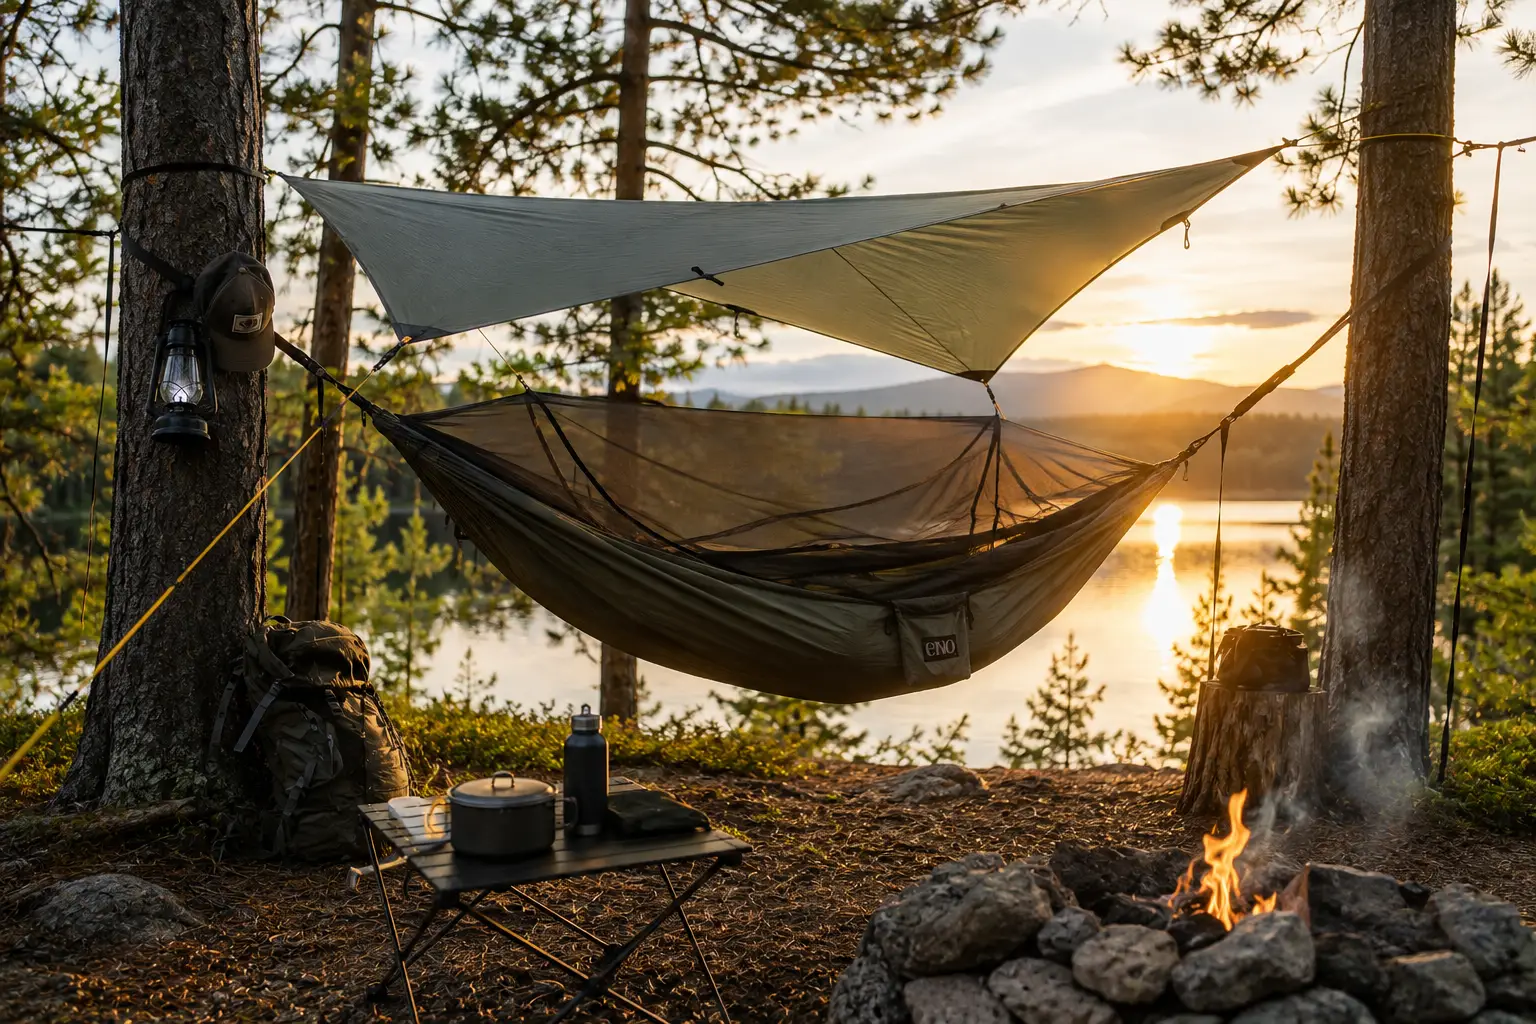
A hammock camping setup is the full system — hammock body, tree-friendly suspension straps, a bug net, a rainfly or tarp, and (for cool nights) an underquilt — that together replace a tent as your backcountry sleep system. Unlike a lounging hammock, a true hammock camping setup is designed for overnight weather protection and repeatable comfort.
If you’ve only ever strung a cheap hammock between two porch posts, the jump to sleeping in one at 6,000 feet with rain in the forecast feels like a different sport entirely. It sort of is. A dialed-in hammock camping setup weighs less than most two-person tents, sets up in minutes once you’ve practiced, and gets you off wet, rocky, or sloped ground that would otherwise wreck a night’s sleep. But it also introduces new variables: strap angle, ridgeline sag, underquilt compression, and the eternal question of “am I going to roll out of this thing at 2 a.m.” This guide breaks down exactly what a complete hammock camping setup includes, compares seven real products worth your money in 2026, and walks through the practical decisions — tree selection, hang angle, rain protection, insulation — that determine whether your first night out feels like magic or misery.
We’ll also cover the hammock tent setup question specifically (an all-in-one shelter versus building your own kit piece by piece), plus how a camping hammock with rainfly stacks up against a traditional tent when the weather turns.
Quick Comparison: Top Hammock Camping Setups at a Glance
| Product | Type | Weight | Weather Protection | Best For |
|---|---|---|---|---|
| ENO DoubleNest Hammock | Lounging / entry hammock | ~19 oz (body only) | None included | First-time buyers, casual campers |
| Kammok Mantis UL | All-in-one hammock tent | ~2 lb 7 oz | Integrated bug net + rainfly | Thru-hikers who want one purchase |
| Hennessy Hammock Expedition Asym Zip | Complete backcountry shelter | ~2 lb 2.6 oz | Integrated bug net + rainfly | Solo backpackers replacing a tent |
| Warbonnet Blackbird XLC | Ultralight backpacking hammock | ~1 lb + tarp | Bug net integrated, tarp separate | Weight-obsessed backpackers |
| Grand Trunk Skeeter Beeter Pro | Budget hammock tent | ~2 lb 4 oz | Integrated bug net, rainfly separate | Beginners testing the hobby |
| Wise Owl Outfitters DoubleOwl | Budget double hammock | ~2 lb | None included | Families, multi-hammock campsites |
| ENO Vulcan UnderQuilt + Atlas XL Straps | Insulation + suspension upgrade | ~3 lb combined | N/A (accessory) | Anyone camping below 50°F |
Looking at the table above, the split is really about how much of the “system” you want handed to you versus assembled yourself. The Kammok Mantis UL and Hennessy Hammock Expedition Asym Zip win on convenience because the bug net and rainfly are already integrated, so there’s no guessing about compatibility. The Warbonnet Blackbird XLC, by contrast, asks you to pair it with a separate tarp, but that modularity is exactly why ultralight backpackers gravitate toward it. Budget shoppers should note that the Grand Trunk Skeeter Beeter Pro and Wise Owl Outfitters DoubleOwl get you into hammock camping for well under $100, with the tradeoff being heavier fabric and, in the DoubleOwl’s case, no included rain protection at all.
💬 Bookmark this comparison — it’s the fastest way to see which setup matches your trip before you scroll through all seven full reviews below.
Top 7 Hammock Camping Setups: Expert Analysis
1. ENO DoubleNest Hammock — easiest hang for total beginners
If you want to find out whether hammock camping is even for you before spending real money on a full shelter system, this is where most people start, and for good reason.
The DoubleNest is built from 70-denier high-tenacity nylon taffeta in a double-layer construction, which in practice means it’s noticeably more durable and less prone to stretching out of shape than the thinner 40D fabrics used in cheaper hammocks. Reviewers consistently point out that the included instructions are the clearest of any hammock on the market, and Outdoor Life’s hands-on hammock testing ranked the DoubleNest as the simplest model to hang correctly out of every hammock in their lineup. That matters more than it sounds like it should: a confusing first hang is the single biggest reason beginners give up on hammock camping after one trip.
Based on comparing the specs against its closest rivals, the DoubleNest’s 400-pound capacity and generous width make it a genuinely comfortable two-person lounger, but as a solo sleep system it shines because the extra fabric width lets you lie on a diagonal, which flattens your body position and eliminates the “banana curl” that makes many first-time hammockers assume all hammocks are uncomfortable. What the spec sheet doesn’t say, but real-world reviews reveal, is that the hammock ships without straps or a bug net, so budget an extra $40-80 for a suspension system if you’re buying this as a standalone piece.
Pros:
- ✅ Widely regarded as the easiest hammock to set up correctly
- ✅ Durable double-layer 70D nylon holds up to years of regular use
- ✅ Compresses small enough for daypacks and car camping alike
Cons:
- ❌ Sold without straps, carabiners, or bug protection
- ❌ No integrated rainfly, so overnight weather protection means separate purchases
Expect to pay in the $35-50 range for the hammock body alone, and closer to $80-110 once you add a strap set. For the price, it’s hard to argue with the value if you’re still deciding whether hammock camping earns a permanent spot in your gear closet.
2. Kammok Mantis UL Ultralight All-in-One Hammock Tent — knotless setup in under a minute
For campers who’d rather buy one integrated system than piece together five separate products, the Mantis UL is the cleanest all-in-one hammock tent currently available.
The headline feature is the knotless suspension system, which lets you go from pack to fully hung in well under a minute once you’ve practiced the motion a few times — a real advantage after a long day on trail when fumbling with straps in the dark is the last thing you want. The Dragonet mesh canopy keeps bugs out without adding noticeable weight, and the structural ridgeline enforces a consistent, repeatable hang shape every time, which removes a lot of the trial-and-error that plagues DIY hammock setups. A “Stargazer” panel on the rainfly rolls back on clear nights, giving you the sky view without sacrificing rain protection if weather rolls in.
Here’s what to weigh: at roughly 2 pounds 7 ounces including the tarp and bug net, this is genuinely light for a complete system, and reviewers who’ve tested it over long-distance trips describe the weight-to-comfort ratio as better than most competing all-in-one kits. The Levitas 20-denier ripstop fabric keeps things light, but it also means the 250-pound weight capacity is a hard limit you shouldn’t push.
Pros:
- ✅ Fastest teardown and setup of any all-in-one kit we compared
- ✅ Integrated bug net, rainfly, and structural ridgeline in one purchase
- ✅ Roll-back “Stargazer” panel for clear-night stargazing without full exposure
Cons:
- ❌ 250-lb weight capacity is lower than several competitors
- ❌ Premium price compared to building a similar kit piece by piece
Expect a price in the $250-300 range, which sits at the higher end of this list, but the convenience of never worrying about component compatibility is a real, honest value proposition for thru-hikers and weekend warriors who don’t want to become gear-tinkerers.
3. Hennessy Hammock Expedition Asym Zip — a backcountry shelter, not a lounger
This is the model REI’s own camp merchandise buyer described as “bombproof,” and after comparing its spec sheet against a decade of consistent field reviews, that reputation checks out.
The asymmetrical design shifts your diagonal lay off-center, which — combined with the bottom-entry zipper — creates a genuinely flat sleeping position that’s rare among gathered-end hammocks. The integrated mesh canopy and separate rainfly work together as a genuine off-the-ground shelter rather than just a bug net with a tarp thrown over it, and reviewers repeatedly cite this as their pick when the goal is fully replacing a tent rather than supplementing one. At roughly 23 ounces total for the standard version, it’s remarkably light for how much weather protection you’re getting.
Reviews consistently report that the bottom-entry zip takes a night or two to get used to (you climb in from underneath rather than the side), but once learned, campers describe it as more secure-feeling in wind than side-entry designs. Based on comparing the fabric specs, the ripstop nylon construction plus fully taped rainfly seams make this one of the few hammocks genuinely rated for sustained rain, not just a passing shower.
Pros:
- ✅ Complete out-of-the-box weather protection — no add-ons required
- ✅ Asymmetrical lay creates one of the flattest sleeping positions available
- ✅ Decades-long reputation for durability in serious backcountry use
Cons:
- ❌ Bottom-entry zipper has a real learning curve for first-timers
- ❌ Narrower body than double-wide loungers, so less room to spread out
Pricing typically falls in the $150-200 range depending on the specific Expedition variant, and given that it replaces both a tent and a sleeping pad for three-season use, the long-term value math works out favorably for anyone doing regular overnight trips.
4. Warbonnet Blackbird XLC — the backpacker’s gear-shelf hammock
Among ultralight backpackers, this hammock has near-cult status, and the reasoning holds up under scrutiny.
What sets the Blackbird apart is the built-in storage shelf and foot box — small design details that translate into genuinely more usable space than a standard gathered-end hammock, especially for stashing a headlamp, phone, or water bottle within arm’s reach overnight. The asymmetric bug net is integrated but can be partially or fully opened depending on bug pressure, giving you flexibility that fixed-net designs don’t offer. Made from 40-denier nylon and rated to a 350-pound capacity that reviewers describe as trustworthy rather than optimistic, it strikes a genuine balance between weight savings and long-term durability.
What most buyers overlook with this model is that the hammock body is sold separately from the tarp and underquilt, meaning your total kit weight and cost depend heavily on which suspension and rain-protection combination you choose — Warbonnet offers both webbing and whoopie-sling suspension options, plus a wide range of tarps sized for different weather scenarios. A custom-built Blackbird kit with a matched tarp and underquilt can beat nearly any all-in-one competitor on weight and comfort, but it demands more research time upfront.
Pros:
- ✅ Integrated storage shelf and foot box add real functional space
- ✅ 350-lb capacity that reviewers describe as conservative, not aspirational
- ✅ Highly modular — pairs with dozens of tarp and underquilt combinations
Cons:
- ❌ Requires separate tarp and suspension purchases to be storm-ready
- ❌ Steeper learning curve for buyers used to all-in-one kits
The hammock body alone typically runs in the $170-220 range, with a comparable tarp adding another $100-160. It’s a premium build for campers who already know they’re committing to hammock camping long-term.
5. Grand Trunk Skeeter Beeter Pro — the most affordable real hammock tent
If you want integrated bug protection without spending like you’re outfitting a thru-hike, this is consistently the budget pick reviewers land on.
The standout engineering choice here is the double ridgeline design, which lifts the bug net away from your face and body and noticeably increases usable interior space compared to single-ridgeline budget competitors — a detail that matters if you plan to read or check a map while lying down. Rated to a 400-pound capacity with a 126-inch overall length, it’s also one of the roomier options at this price point. Reviews consistently report that the parachute-nylon construction, the same material family used in some military field gear, holds up to repeated rough handling better than its price would suggest.
On paper, the tradeoff is fabric feel and finish: the nylon is stiffer against skin than premium options like the DoubleNest or Mantis, and the included rainfly (sold separately on some bundles) is a basic tarp rather than a fully engineered, taped-seam shelter. For a first hammock tent, though, honest reviewers agree it over-delivers for the price.
Pros:
- ✅ Double ridgeline meaningfully increases headroom and interior space
- ✅ 400-lb capacity and 126-inch length outsize many pricier competitors
- ✅ Genuinely low price of entry for a true hammock tent
Cons:
- ❌ Fabric feels stiffer and less refined than premium alternatives
- ❌ Rainfly quality is basic compared to integrated systems like the Mantis
At around $65-90, it’s the setup we’d point a curious first-timer toward if the ENO DoubleNest feels too bare-bones and the Hennessy feels like too much commitment.
6. Wise Owl Outfitters DoubleOwl Hammock — best for families and multi-hammock campsites
When you need several hammocks for one trip — think a family campsite or a group of friends — the math on this one is straightforward: four DoubleOwls cost roughly the same as a single premium hammock with straps.
At 10 by 6.5 feet, the DoubleOwl is actually one of the largest hammocks on this list, and its 500-pound capacity matches premium options like the Kammok Roo. The 210T parachute nylon is, honestly, noticeably stiffer and less breathable against skin than ENO’s 70D fabric or Kammok’s proprietary GravitasX — that’s a real tradeoff, not a marketing exaggeration, and buyers coming from a premium hammock will feel the difference immediately. The included carabiners are functional wire-gate style rather than locking hardware, which is fine for casual use but worth upgrading if you’re hanging over rocky or elevated terrain.
Reviews consistently describe this as extraordinary value for casual and family use — the question reviewers keep circling back to isn’t whether it works (it reliably does), but whether the fabric feel and hardware quality justify spending three times more on a premium alternative for your specific use case.
Pros:
- ✅ Largest sleeping dimensions of any hammock on this list
- ✅ 500-lb capacity ties premium hammocks at a fraction of the price
- ✅ Extremely strong value when buying multiples for a group
Cons:
- ❌ Stiffer, less breathable fabric than premium nylon options
- ❌ Included carabiners are basic wire-gate, not locking hardware
Typically priced in the $25-40 range, this is genuinely one of the best dollar-for-dollar entries into hammock camping, especially if you’re outfitting more than one person.
7. ENO Vulcan UnderQuilt + Atlas XL Hammock Straps — the upgrade that actually keeps you warm
This is the one item on the list that isn’t a hammock at all, and it’s here because no hammock camping setup is complete without addressing two problems every hammock owner eventually hits: cold-butt syndrome and tree damage from bad straps.
The Vulcan UnderQuilt wraps around the underside of your hammock rather than compressing beneath you the way a sleeping bag or pad would, which matters because compressed insulation loses nearly all of its warming ability — this is genuinely the most misunderstood gap in hammock camping setups, and it’s why so many first-timers report being freezing cold even with a “warm enough” sleeping bag. Rated for roughly 30-50°F use, the Vulcan uses a two-layer quilted construction with a water-repellent finish, and the suspension attaches directly to the hammock’s aluminum toggles without requiring separate straps or complicated tensioning. Paired with it, the Atlas XL straps extend the standard Atlas design to 13.5 feet with 40 combined adjustment points, giving you far more flexibility on tree spacing than the six-foot ropes that ship with budget hammocks.
Here’s what most gear guides don’t tell you clearly enough: strap width is a genuine environmental issue, not just a comfort preference. Leave No Trace’s hammock camping guidelines call for straps at least 1 inch wide, because narrower webbing or rope concentrates force on a small patch of bark and can slowly girdle the tree’s cambium layer, cutting off its ability to move nutrients. The Atlas XL’s 1.5-inch webbing clears that bar comfortably, which is one more reason to retire narrow rope suspension the first chance you get.
Pros:
- ✅ Solves cold-sleeper problems that a sleeping bag alone can’t fix
- ✅ Atlas XL’s 1.5-inch webbing meets Leave No Trace tree-protection standards
- ✅ Quick-attach toggle system needs no separate straps for the underquilt
Cons:
- ❌ Adds real pack weight and bulk for an accessory, not a shelter
- ❌ Underquilt alone doesn’t replace a rainfly for wet-weather protection
Budget around $150-180 for the underquilt and $25-35 for the straps. If you only upgrade one thing after your first cold night out, this combination should be it.
How to Set Up a Hammock Camping System, Step by Step
Getting the physical hang right is where most beginners struggle, so here’s the process real hammock campers rely on.
- Pick two living, healthy trees roughly 12-15 feet apart. Avoid dead trees or ones that lean, since a load-bearing dead limb is a genuine safety hazard, not just a theoretical one.
- Wrap straps around the trunk at least 5 feet up. This keeps the hammock’s angle manageable and reduces stress concentrated on any single point of bark contact.
- Aim for a 30-degree hang angle. This is the single most important number in hammock camping — too tight and the hammock feels like a tight taco; too loose and it sags dangerously close to the ground.
- Hang the ridgeline, then sit before you commit. Test the hang with your weight before fully settling in, and adjust strap tension until the lowest point sits roughly 18 inches off the ground.
- Lie diagonally, not lengthwise. This is the trick that fixes almost every “hammocks are uncomfortable” complaint — a diagonal lay flattens your spine instead of curling it.
- Add the underquilt before the bug net. Attaching insulation after the net is on makes the process significantly more frustrating in the dark.
- Pitch the rainfly at a steep asymmetric angle if rain is likely. A tighter pitch on the windward side sheds water faster and reduces flapping noise overnight.
✨ Ready to build your kit? Compare the full lineup above and check current pricing before your next trip — availability and stock shift fast during peak camping season.
Common Mistakes to Avoid When Buying a Hammock Camping Setup
Even experienced campers get tripped up by a handful of predictable errors, and most of them are avoidable with a little foresight.
The biggest one is buying a hammock without checking whether straps and a bug net are included — many budget listings show an attractive price that excludes both, and you won’t discover the gap until you’re already at the trailhead. A close second is underestimating temperature: hammock camping is colder than ground camping at the same air temperature because wind moves underneath your body all night, so a sleeping bag rated for 30°F will genuinely feel colder in a hammock without an underquilt. Buyers also frequently skip weight-capacity math — a 400-pound rating usually accounts for gear and movement, but it’s not infinite headroom, and exceeding it stresses seams over repeated use even if nothing fails on the first trip. Finally, don’t assume all carabiners are created equal; the wire-gate hardware bundled with budget kits is fine for casual use, but swapping to rated locking carabiners is a cheap insurance policy if you’re hanging over rocky terrain or at any real height.
Hammock Camping Setup vs. Traditional Tent Camping
The comparison campers actually care about is real-world performance, not spec sheets in isolation.
| Factor | Hammock Setup | Traditional Tent |
|---|---|---|
| Ground requirements | Works on rocky, sloped, or wet ground | Needs flat, clear ground |
| Pack weight (full system) | 2-4 lbs typical | 3-6 lbs typical (solo) |
| Setup speed (practiced) | 2-5 minutes | 3-8 minutes |
| Cold-weather comfort | Requires underquilt add-on | Works with standard pad |
| Group/family use | Best with multiple hammocks | Naturally shares one shelter |
Terrain flexibility is the hammock’s clearest advantage — you’re no longer searching for a flat, rock-free patch of ground, which opens up far more legal, low-impact campsite options in rocky or sloped terrain. On the other hand, a traditional tent wins decisively on cold-weather ease, since a standard sleeping pad handles insulation without an additional purchase, and tents remain the more practical choice for families sharing one shelter rather than hanging several hammocks. Neither system is objectively better; the right pick genuinely depends on the terrain you camp in most and how much you value ground independence versus one-shelter simplicity.
Hammock Tent Setup for Beginners: What to Buy First
If your search led you here specifically wondering about a hammock tent setup rather than a bare lounging hammock, the decision tree is simpler than it looks.
Start with an all-in-one kit like the Kammok Mantis UL or Hennessy Hammock Expedition Asym Zip if you want zero compatibility guesswork — every component is designed to work together out of the box, and you’re paying for that engineering. Choose the modular route with something like the Warbonnet Blackbird XLC only once you know your preferences well enough to shop tarps and underquilts separately; it rewards research with better weight and comfort but punishes impatience. And if you’re not sure hammock tent camping is for you at all, the Grand Trunk Skeeter Beeter Pro offers genuine bug and light-rain protection at a price low enough that a disappointing first trip won’t sting.
Camping Hammock With Rainfly: Do You Actually Need One?
Short answer: yes, for anything beyond a backyard nap or a guaranteed-dry, single night.
A rainfly isn’t just about active rain — it also blocks morning dew, which soaks an uncovered hammock and bug net far more often than actual storms do in most US climates. CleverHiker’s long-term hammock testing, which covered thousands of trail miles across a dozen models, found that the kits performing best in variable weather were consistently the ones with a properly tensioned, steeply pitched rainfly rather than a flat one. If your chosen hammock doesn’t include a fly — like the ENO DoubleNest or Wise Owl Outfitters DoubleOwl — budget for one separately rather than skipping it; a $40-60 add-on tarp is far cheaper than a miserable, soaked night.
Long-Term Cost and Maintenance
Buying the setup is only half the cost equation — what you spend keeping it functional matters just as much.
A complete hammock camping setup, including hammock, straps, bug net, and rainfly, typically lands between $150 and $450 depending on which of the seven products above you choose, with underquilts adding another $100-180 if you camp in cooler seasons. Compared to a quality backpacking tent, which frequently runs $250-500 on its own before a sleeping pad, the total cost of ownership is often comparable or lower over a multi-year span, especially since hammocks don’t require replacing worn-out tent poles or repairing torn floor fabric from rocky ground. Maintenance is minimal: rinse and air-dry the hammock body after salty or muddy trips, re-seam-seal a rainfly every year or two if it sees heavy use, and inspect strap webbing for fraying before every season. Underquilts need occasional fluffing to maintain loft, similar to a sleeping bag, and should always be stored uncompressed between trips to preserve insulating power.
Safety, Regulations, and Standards for Hammock Camping
Hammock camping is genuinely low-impact compared to tent camping, but that doesn’t mean it’s regulation-free.
Strap width is the biggest safety-meets-environmental-policy issue in the hobby. Guidance from multiple hammock-industry sources puts the minimum strap width at 0.75 inches at the point of tree contact, with 1.5 inches considered ideal for bark protection at popular, heavily used campsites, and several land management agencies have begun restricting or banning narrow rope suspension outright because of documented bark and cambium damage. On the safety side, official hammock camping guidance recommends hanging no higher than 18 inches off the ground to limit injury risk from falls and to reduce impact on higher branches, and it’s worth inspecting any tree you choose for dead overhead limbs before committing your full body weight beneath them — the same commonsense check REI’s gear experts recommend before trusting any tree with an overnight hang. Many state and national parks also have location-specific hammock policies — some ban hammocking near sensitive root systems or in high-traffic areas entirely — so a quick check of local regulations before your trip is genuinely worth the two minutes it takes.
What to Expect: Everyday Performance
Specs only tell part of the story; here’s how these systems actually feel across a typical three-season camping season.
On a mild summer night, any of the seven products above will keep you comfortable with just the hammock, bug net, and maybe a light top quilt — this is where budget picks like the Grand Trunk Skeeter Beeter Pro and Wise Owl Outfitters DoubleOwl genuinely shine, since premium fabric feel matters less when the weather is forgiving. Shoulder-season trips (40s and 50s overnight) are where the gap widens fast: without an underquilt, even experienced campers report waking up cold from underneath despite feeling warm on top, which is exactly the scenario the ENO Vulcan UnderQuilt solves. In sustained rain, the difference between an integrated system like the Hennessy Hammock Expedition Asym Zip and a bare hammock with an add-on tarp becomes obvious within the first hour — taped seams and a properly engineered pitch angle keep water out where a generic tarp often lets it wick in at the edges.
Frequently Asked Questions
❓ Is hammock camping warmer or colder than tent camping?
❓ What size trees do I need for a hammock camping setup?
❓ Can beginners hammock camp without buying an underquilt right away?
❓ How much does a full hammock camping setup cost?
❓ Do hammock straps damage trees?
Conclusion
A well-chosen hammock camping setup solves problems tent camping simply can’t — rocky ground, sloped sites, and the general hassle of finding a flat clearing all stop mattering once you’re hanging between two trees. The right pick depends entirely on your priorities: the ENO DoubleNest and Wise Owl Outfitters DoubleOwl make sense if you’re still testing the waters, the Grand Trunk Skeeter Beeter Pro is the honest budget hammock tent pick, and the Kammok Mantis UL or Hennessy Hammock Expedition Asym Zip deliver full weather protection without any assembly required. Serious backpackers chasing every possible ounce should look at the Warbonnet Blackbird XLC, and nearly everyone camping outside of peak summer should eventually add the ENO Vulcan UnderQuilt and a set of wide, tree-friendly straps. Whichever combination you land on, the fundamentals stay the same: pick healthy trees, respect the 30-degree hang angle, lie diagonally, and don’t skip rain and insulation protection just because the forecast looks clear.
✨ Don’t miss these exclusive deals! 🔍 Take your hammock camping setup to the next level with this carefully curated lineup. Click a highlighted item to check current pricing and availability. These picks will help you get a genuinely comfortable, weather-ready night’s sleep the whole family will enjoy!
Recommended for You
- Singlenest Hammock: 7 Best Picks for Comfortable Camping in 2026
- Hanging Rope Chair: 7 Best Picks for 2026 (Buyer’s Guide)
- 7 Best Patio Hammock Chairs of 2026: Comfort Meets Value
Disclaimer: This post contains affiliate links. As an Amazon Associate, I earn from qualifying purchases made through these links, at no additional cost to you.
✨ Found this article helpful? Share it with someone who needs it! 💬🤗