
In This Article
Why a Good Hammock Tent Setup Changes Everything
Picture this: it’s 9 p.m., the light is fading fast, the ground at your campsite is a lumpy mix of roots and rocks, and the mosquitoes have clearly sent out invitations. A ground tent turns that into a miserable night. A solid hammock tent setup turns it into the best sleep of your trip — as long as you know how to hang it.
That “as long as” is the whole story. Most of the complaints you’ll read about hammock camping — cold backs, saggy banana-shaped sleep, rain dripping down the straps, a bug net mashed against your face — come from setup mistakes, not from the hammock itself. Get the angles, the ridgeline, and the tarp right, and even a budget kit sleeps surprisingly well.
What Is a Hammock Tent Setup?
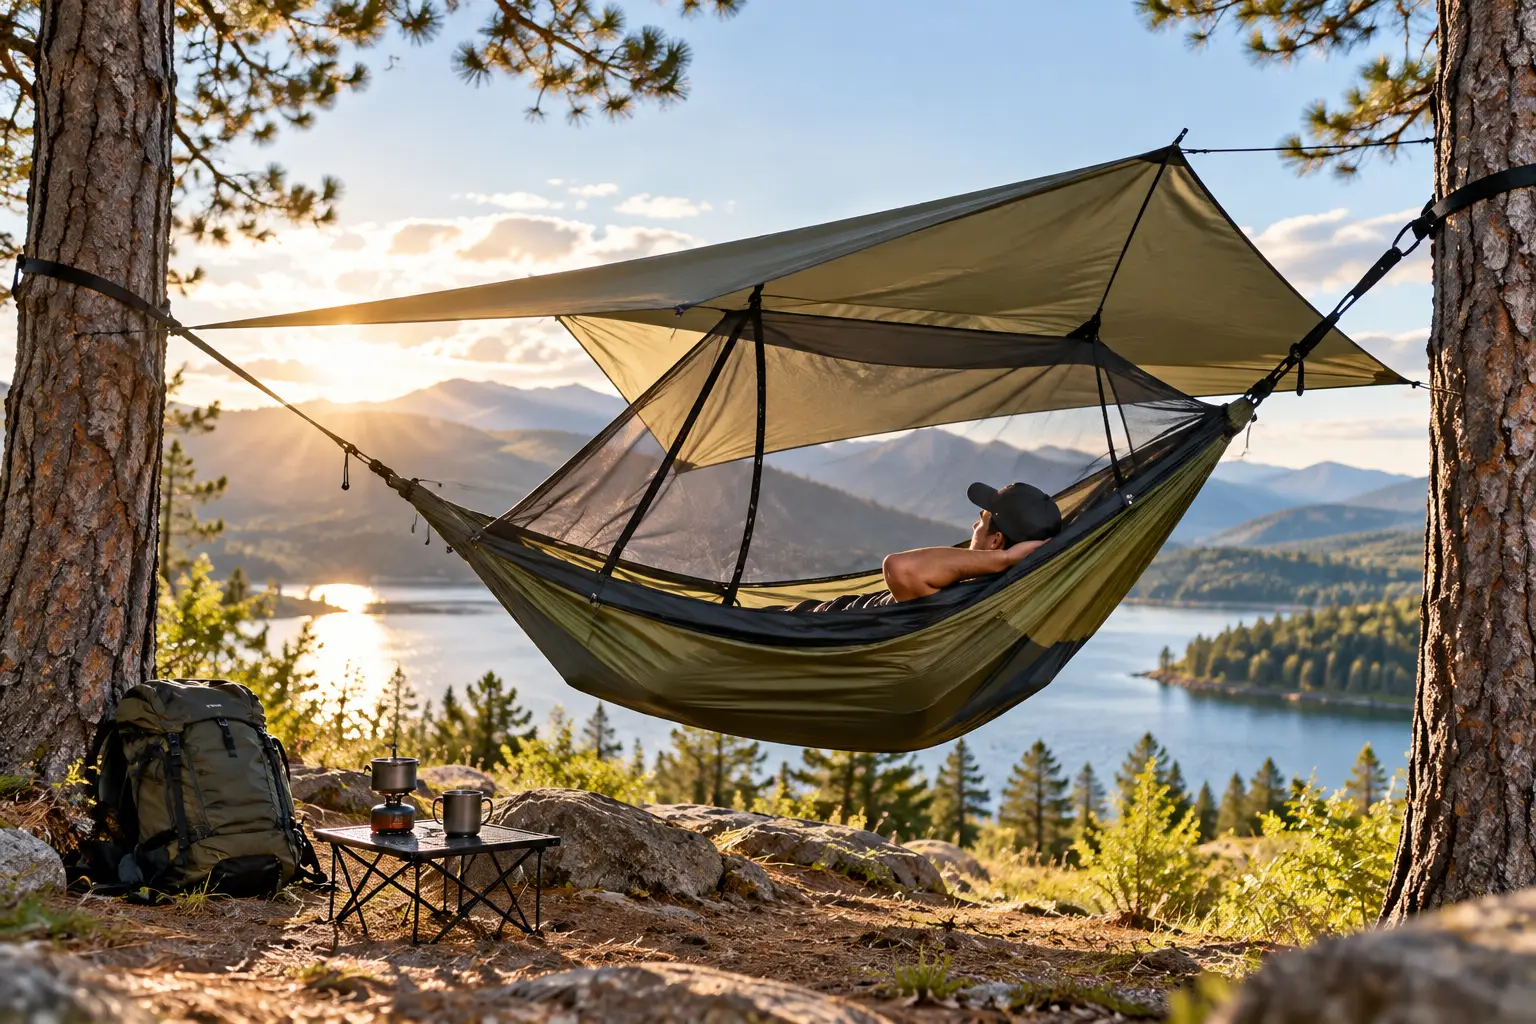
A hammock tent setup is a suspended shelter system that combines a camping hammock, an integrated or attached bug net, a rain fly (tarp), and tree-friendly suspension straps. Hung between two healthy trees at roughly a 30-degree angle, it keeps you off wet, rocky, or sloped ground while protecting you from insects and weather.
If you want the historical and cultural backstory, the hammock camping overview on Wikipedia is a solid primer — including the point that hammock sites leave far less visible impact than trampled tent pads.
In this guide, you’ll get a quick comparison of seven real, widely available hammock tents, an honest breakdown of each one (based on manufacturer specs and aggregated customer reviews — not invented “field tests”), a step-by-step walkthrough on how to set up a hammock tent, and the problem-solving tips that listings never mention. Let’s hang.
Quick Comparison: Hammock Tent Setup Kits at a Glance
Before the deep dive, here’s the 30-second version. Prices are approximate ranges at the time of writing — check the current price, since they shift often.
| Product | Type | Approx. Weight | Capacity | Price Range | Best for |
|---|---|---|---|---|---|
| Sunyear Hammock with Rain Fly and Net | All-in-one budget kit | ~5.8 lb (full kit) | 500 lb | $50–$90 | Sunyear Hammock with Rain Fly and Net: first-timers on a budget |
| ENO JungleNest Hammock | Hammock + bug net (tarp sold separately) | 20 oz (hammock only) | 300 lb | $100–$120 | ENO JungleNest Hammock: buggy summer trips |
| Hennessy Hammock Expedition Asym Zip | Asymmetric all-in-one | 2 lb 12 oz + 3 oz straps | 250 lb | $150–$200 | Hennessy Hammock Expedition Asym Zip: flatter lay, classic design |
| Grand Trunk Air Bivy | Hammock + hex tarp | ~3 lb 5 oz | 400 lb | $180–$220 | Grand Trunk Air Bivy: big or tall campers |
| Lawson Blue Ridge Camping Hammock | Hybrid hammock/ground tent | 4.25 lb | 275 lb | $200–$240 | Lawson Blue Ridge Camping Hammock: mixed terrain, no-tree backup |
| Kammok Mantis All-in-One Hammock Tent | Premium all-in-one | 2 lb 4 oz | 300 lb | $230–$320 | Kammok Mantis All-in-One Hammock Tent: backpackers who want light + simple |
| Haven Tent XL | Lay-flat hammock tent | ~7 lb (full kit) | Varies by listing | $340–$400 | Haven Tent XL: side sleepers chasing bed-like comfort |
Reading the table, a clear pattern jumps out: weight and price don’t move together. The Kammok Mantis All-in-One Hammock Tent is one of the lightest complete systems here, while the Haven Tent XL costs more and weighs more because it buys you something different — a genuinely flat sleeping surface. Meanwhile, the Sunyear Hammock with Rain Fly and Net delivers the highest capacity for the least money, but you pay for it in pack weight.
💬 One click helps other shoppers make an informed choice too! 😊
Top 7 Hammock Tents for an Easy Setup: Expert Analysis
1. Sunyear Hammock with Rain Fly and Net — best all-in-one value
If you want everything in one box for less than a nice dinner out, this is the obvious starting point. The kit includes a 210T parachute-nylon hammock with attached netting, two 10-foot adjustable tree straps, 12kN carabiners, a large waterproof rain fly with a ridgeline, guy ropes, and stakes. In practice, that means you can walk out of the house with zero extra purchases — rare at this price.
The 500-pound rating is generous and makes it a reasonable pick for heavier campers or for lounging with a partner, though sleeping two people in any gathered-end hammock is cramped. The trade-off is weight: the full bundle runs around 5.8 pounds per the listing, which is fine for car camping and short hikes but heavy for long backpacking days. It’s best for beginners, festival campers, and scout families testing whether hammock camping is “their thing.”
Aggregated customer reviews consistently praise the value, the triple-stitched body seams, and the attached net with its double zipper. The most common complaint is that the rain fly takes some fiddling to pitch neatly.
Pros:
- ✅ Truly complete kit — nothing else to buy
- ✅ High 500 lb weight rating for the price
- ✅ Bug net flips over for open-air lounging
Cons:
- ❌ Full kit is heavy for backpacking
- ❌ Rain fly pitch takes practice to get taut
Expect roughly $50–$90 depending on the bundle — outstanding value as a low-risk entry point.
2. ENO JungleNest Hammock — best bug protection for its weight
ENO built this one for people who hate waking up as a mosquito buffet. It pairs a 10-foot hammock body with an integrated no-see-um bug net, a built-in structural ridgeline, and a featherlight DAC spreader bar that lifts the net off your face like a mini tent canopy.
The structural ridgeline is the quiet hero here: it sets the same sag every time, which removes one of the biggest variables in hammock tent setup. The 10-foot length also makes a diagonal lay easier, which is the secret to flatter sleep. At about 20 ounces and 300 pounds of capacity, the ENO JungleNest Hammock suits backpackers who already own a tarp — or who plan to buy ENO’s JungleLink bundle, which adds Helios straps and a DryFly tarp.
Retail reviews repeatedly highlight how easy the setup is and how much campers appreciate the attached net. A recurring wish is for a higher weight limit, and some buyers dislike the toggle-style strap connection.
Pros:
- ✅ Structural ridgeline gives a consistent hang
- ✅ Spreader bar keeps netting off your face
- ✅ Light enough for serious backpacking
Cons:
- ❌ Straps and rain tarp sold separately
- ❌ 300 lb limit trails budget kits
Around $100–$120 for the hammock alone (the full JungleLink system typically runs higher) — great value if you build around it.
3. Hennessy Hammock Expedition Asym Zip — the flatter-lay classic
Hennessy pioneered the asymmetric hammock, and this model is the brand’s most popular zippered version. The bed is cut on a diagonal, so you naturally lie flatter, while a patented structural ridgeline and an asymmetric rainfly are designed to fit the hammock’s shape.
That asymmetric fly is a real practical win: because it’s tailored to the hammock, it’s very hard to pitch incorrectly. The 70-denier nylon taffeta body is tougher than many ultralight fabrics, which matters if you’re rough on gear. However, Hennessy rates it for campers up to 250 pounds and about 6 feet tall, so larger hikers should look elsewhere.
Independent reviewers generally call it comfortable for an all-in-one kit, but also note that the setup is less intuitive than standard designs and the diamond-shaped tarp covers the hammock with little extra room. Buyer reviews also mention the sway when climbing into a sleeping bag.
Pros:
- ✅ Asymmetric cut makes flat sleeping easier
- ✅ Matched rainfly is nearly foolproof to pitch
- ✅ Durable 70D fabric holds up to abuse
Cons:
- ❌ Not ideal for campers over 6 feet
- ❌ Small tarp offers limited storm coverage
Typically $150–$200 — fair value for a proven, durable system.
4. Grand Trunk Air Bivy — best budget pick for big and tall campers
The Grand Trunk Air Bivy pairs the Skeeter Beeter XT netted hammock with a hex-shaped Hexfly rain tarp. Grand Trunk rates the hammock for 400 pounds, and one retail reviewer at 6’7″ and over 300 pounds described it as roomy — a rare win for larger campers.
The Hexfly uses 20-denier silnylon with taped seams and a 2000mm PU coating, and its hex cut saves weight compared with the boxy square tarps you’ll see in most cheap kits. In practice, that means decent coverage without carrying a bedsheet-sized tarp. Measured weight lands around 3 pounds 5 ounces for hammock plus tarp — not ultralight, but reasonable.
CleverHiker named it a strong budget all-in-one, while noting the interior gear loft sags into the sleeping area once loaded. On the retail side, there are fewer reviews to aggregate than for bigger brands, so treat sentiment as limited; one buyer reported receiving the wrong tarp, so check your box on arrival.
Pros:
- ✅ 400 lb capacity suits larger campers
- ✅ Hex silnylon tarp balances weight and coverage
- ✅ Knotless cordlock system speeds tarp setup
Cons:
- ❌ Gear loft sags when loaded
- ❌ Fewer reviews than major brands
Around $180–$220 — solid value if capacity matters most.
5. Lawson Blue Ridge Camping Hammock — the no-tree backup plan
Here’s the hybrid of the group: hang it as a hammock, or pitch it on the ground as a tent using trekking-style arch poles. An arch pole and spreader bar system keeps the bed taut, cutting down the “cocoon” squeeze many hammocks create.
That versatility is the whole point. If you camp in places where trees are sparse or rules forbid hanging, the Lawson Blue Ridge Camping Hammock still gives you shelter. The rainfly attaches directly to the hammock, so you don’t need extra trees for a tarp. On the downside, 4.25 pounds is heavy for a one-person shelter, the 275-pound limit is middle-of-the-road, and hammock straps are sold separately.
Buyer reviews repeatedly praise its build quality and the brand’s responsive customer service. The most common caution: spreader bars make it feel tippy at first, so practice getting in and out at home.
Pros:
- ✅ Works as a hammock or ground tent
- ✅ Fly attaches directly — no extra anchors
- ✅ Taut bed reduces calf pressure
Cons:
- ❌ Heavy for a solo backpacking shelter
- ❌ Straps not included in the base kit
Usually $200–$240 — worth it if flexibility beats weight for you.
6. Kammok Mantis All-in-One Hammock Tent — lightest complete system here
Kammok’s Mantis bundles a hammock body, a mesh canopy, a structural ridgeline, a rainfly with six guy-outs, Kanga Claw carabiners, and Python UL straps into one 2-pound-4-ounce package. Kammok markets it as a 60-second setup thanks to its knotless suspension.
The 20-denier Levitas ripstop body feels soft and breathable, and the 136 x 88-inch rainfly gives you meaningfully more coverage than the Hennessy’s small diamond tarp. That translates directly into more dry space for cooking or changing during storms. With a 300-pound capacity, it’s the sweet spot for backpackers who want one purchase that just works.
REI reviewers frequently call it an ideal first hammock-tent system and praise how compact it packs. Common critiques include guy lines that some owners swap for lighter cord, and a bug-net zipper that stops partway along the body. If you’re considering the UL version, note it has a lower margin for heavier users than the standard model.
Pros:
- ✅ Full system at just over 2 pounds
- ✅ Generous rainfly for storm coverage
- ✅ Knotless suspension speeds up setup
Cons:
- ❌ Pricier than most budget kits
- ❌ Bug-net zipper doesn’t run full length
Expect around $230–$320 depending on version — strong value for frequent backpackers.
7. Haven Tent XL — truly flat sleep for side sleepers
The Haven Tent XL is built for people who’ve tried regular hammocks and couldn’t sleep on their side. Its lay-flat design uses a structured body and an included insulated pad to create a bed-like surface, plus an integrated bug net and a rainfly the listing rates at 4000mm waterproofing.
That flat lay is the headline: no diagonal technique, no shoulder squeeze, just lie down. The included pad also handles insulation underneath — a big deal, since cold-back syndrome is the number one hammock complaint. The cost is weight: roughly 5 pounds minimum trail weight and around 7 pounds all-in, plus a premium price.
Owner reviews often describe it as the best hammock sleep they’ve had, especially among side sleepers. The recurring criticisms are that it feels tippy at first and that it’s heavy for long-distance backpacking.
Pros:
- ✅ Genuinely flat lay for side sleepers
- ✅ Insulated pad included in the kit
- ✅ Highly waterproof rainfly per listing
Cons:
- ❌ Heaviest system on this list
- ❌ Premium price for a solo shelter
Typically $340–$400 — worth it if comfort is your non-negotiable.
Side-by-Side: How the Top 7 Stack Up
| Product | Bug Net | Rain Fly Included | Straps Included | Lay Style | Best for |
|---|---|---|---|---|---|
| Sunyear Hammock with Rain Fly and Net | Attached | Yes | Yes | Diagonal | Sunyear Hammock with Rain Fly and Net: budget starters |
| ENO JungleNest Hammock | Integrated + spreader bar | No | No | Diagonal | ENO JungleNest Hammock: modular builders |
| Hennessy Hammock Expedition Asym Zip | Integrated | Yes (asym) | Yes | Asymmetric | Hennessy Hammock Expedition Asym Zip: back sleepers |
| Grand Trunk Air Bivy | Integrated | Yes (hex) | No | Diagonal | Grand Trunk Air Bivy: tall campers |
| Lawson Blue Ridge Camping Hammock | Integrated | Yes (attached) | No | Spreader bar | Lawson Blue Ridge Camping Hammock: treeless backup |
| Kammok Mantis All-in-One Hammock Tent | Integrated | Yes | Yes | Diagonal | Kammok Mantis All-in-One Hammock Tent: ultralight-ish all-rounders |
| Haven Tent XL | Integrated | Yes | Yes | Flat | Haven Tent XL: side sleepers |
The table highlights a cost that’s easy to miss: “cheaper” hammocks sometimes aren’t cheaper once you add straps and a tarp. The ENO JungleNest Hammock and Grand Trunk Air Bivy both need straps, so budget an extra $25–$40. If you hate shopping for accessories, the Sunyear Hammock with Rain Fly and Net, Kammok Mantis All-in-One Hammock Tent, and Hennessy Hammock Expedition Asym Zip let you open one box and go.
✨ Don’t miss these top-rated hammock tent picks!
🔍 Take your camping to the next level with this carefully curated lineup. Click a highlighted product to check current pricing and availability. These picks will help you get dry, bug-free, genuinely restful nights in the woods! 🌲
How to Set Up a Hammock Tent: Step-by-Step
This is where most first trips succeed or fail. Here’s the process that works for nearly every model above.
1. Pick your trees. Look for two healthy, living trees about 12–15 feet apart and at least as thick as a dinner plate. Look up for dead branches before committing.
2. Hang the straps. Wrap tree straps around each trunk at roughly head height (around 6 feet for most adults). Wide, flat webbing protects bark far better than rope.
3. Aim for the 30-degree angle. The most important rule in any hammock tent setup: your suspension should sit about 30 degrees from horizontal. Too tight (flat lines) multiplies the force on the straps and squeezes you into a cocoon; a relaxed 30-degree angle creates a deep, comfortable sag.
4. Check sit height. Loaded, the hammock should sit about chair height — roughly 18 inches off the ground — so you can sit down and swing your legs in easily.
5. Pitch the tarp first in rain. If weather threatens, string your tarp ridgeline above the hammock before hanging the body so your gear stays dry.
6. Add drip lines. Tie a short cord on each suspension line, just inside the tarp edge, so rainwater drips off instead of wicking down into your bed.
7. Lie diagonally. In a gathered-end hammock, angle your body about 15–20 degrees off center. You’ll lie dramatically flatter.
8. Test before dark. Do a quick sit test, re-tension, then set up insulation.
⚡ Pro tip: practice your full hammock camping setup in the backyard twice before your trip. Fumbling with buckles at dusk is no fun.
Real-World Scenarios: Matching a Hammock Tent to Your Trip
Specs only matter in context, so here are three common buyer profiles and how they map onto the lineup.
The weekend car camper on a budget
Maya camps four or five times a year at state parks, drives to her site, and wants to spend under $100. Weight barely matters because the car does the carrying. The Sunyear Hammock with Rain Fly and Net fits perfectly: everything’s included, the 500-pound rating is reassuring, and its 5.8-pound kit is irrelevant when the walk from the parking spot is 50 yards. Her one upgrade: a closed-cell foam pad for chilly spring nights.
The thru-hike-curious backpacker
Jordan logs 10–15 miles a day on weekend trips and is thinking about a section of the Appalachian Trail. Every ounce counts, but so does simplicity at the end of a long day. The Kammok Mantis All-in-One Hammock Tent is the logical pick — a complete shelter at just over 2 pounds with a rainfly big enough for real storms. If Jordan already owns a tarp, the ENO JungleNest Hammock plus straps is a lighter, cheaper alternative.
The side sleeper who “can’t sleep in hammocks”
Chris tried a friend’s hammock once and woke up with a stiff neck. Budget is flexible; comfort is not. Most trips are short hikes from the car. The Haven Tent XL solves the core problem with a flat lay and included insulation. If Chris also wants the option to pitch on the ground, the Lawson Blue Ridge Camping Hammock is the runner-up thanks to its taut spreader-bar bed.
The pattern across all three? Start with how far you’ll carry the shelter and how you sleep — then pick the product.
Hammock Tent Setup Problems and How to Fix Them
Even with a great kit, things go sideways. Here are the five issues reviewers and experienced hangers mention most, with fixes.
Problem 1: Cold back, even in summer. Your sleeping bag’s insulation gets crushed under your body weight, and moving air steals heat from underneath. Fix: Add an underquilt or a closed-cell foam pad. The Haven Tent XL includes a pad; most others need one added.
Problem 2: Banana-shaped sleep and calf pressure. Usually caused by hanging too tight or lying straight down the centerline. Fix: Loosen to a 30-degree hang angle and lie diagonally. A structural ridgeline, like the one on the ENO JungleNest Hammock or Hennessy Hammock Expedition Asym Zip, locks in the right sag every time.
Problem 3: Water running down the straps. Rain follows the suspension straight into the hammock. Fix: Tie drip lines, and make sure the tarp extends at least 6 inches past each end of the hammock.
Problem 4: Bug net plastered on your face. Fix: Use a ridgeline or spreader bar to lift the netting. If yours lacks one, tie a cord between the suspension points and clip the net to it.
Problem 5: Too tippy getting in. Common with spreader-bar designs like the Lawson Blue Ridge Camping Hammock. Fix: Sit in the center first, then swing your legs in while keeping your weight low.
💡 Quick win: carry a small pack of mitten hooks or mini carabiners — they solve half of these problems in seconds.
How to Choose a Hammock Tent Setup
If you only read one decision section, make it this one. Here are seven criteria, ranked by how much they affect your sleep.
- Sleep style. Back sleepers do well with standard diagonal hammocks; committed side sleepers should look at lay-flat or asymmetric designs.
- Weight capacity. Choose a rating at least 50 pounds above your body weight plus gear, so you’re never riding the limit.
- Hammock length. Longer bodies (10–11 feet) make diagonal lay easier, especially if you’re over 6 feet tall.
- Bug protection. An integrated net with a ridgeline or spreader bar beats a separate sock-style net for convenience.
- Tarp coverage. In rainy regions, choose a hex or rectangular tarp that clears each hammock end by several inches.
- Suspension type. Wide webbing with buckles or carabiners is faster and kinder to trees than rope.
- Total pack weight. Add up hammock, tarp, straps, and insulation before comparing to a ground tent.
For a responsible starting point on tree protection, the Leave No Trace organization’s hammock camping guidelines recommend tree-saver straps between 0.75 and 1.5 inches wide, avoiding dead trees, and using established campsites. Following those rules also tends to produce a better, more stable hang — the environment and your comfort line up nicely here.
Hammock Tent vs Ground Tent: Which Makes More Sense?
It’s the question every new hanger asks. The honest answer: it depends on where you camp.
| Factor | Hammock Tent | Ground Tent | Best for |
|---|---|---|---|
| Terrain flexibility | Works over rocks, roots, slopes | Needs flat, clear ground | Hammock: rugged forest sites |
| Tree dependence | Requires two suitable trees | Works anywhere | Ground: deserts, alpine, beaches |
| Comfort | Excellent once dialed in | Depends on pad quality | Hammock: back and diagonal sleepers |
| Cold weather | Needs underquilt or pad | Pad usually enough | Ground: winter beginners |
| Site impact | Minimal footprint | Compresses vegetation | Hammock: Leave No Trace focus |
Looking at the table, the deciding factor usually isn’t comfort — it’s trees. In the forested East and Pacific Northwest, a hammock tent opens up countless campsites; in desert Southwest terrain, it can leave you stranded. If you split your time, the Lawson Blue Ridge Camping Hammock is the only pick here that bridges both worlds.
There’s also a learning-curve gap. Ground tents are intuitive; a hammock tent setup rewards a couple of practice runs. Once you’ve done it three or four times, though, many campers report it’s actually faster than pitching a tent — no searching for a flat spot, no clearing pinecones, no wet floor. And in buggy, wet forests, sleeping off the ground keeps you away from puddles, critters, and creeping water during heavy rain.
Hammock Tent with Rain Fly: Getting Weather Protection Right
A hammock tent with rain fly coverage is only as good as the fly’s shape and how you pitch it. This is the most under-appreciated part of the purchase.
Tarp shapes, translated
- Diamond/asymmetric (e.g., Hennessy Hammock Expedition Asym Zip): light and matched to the hammock, but minimal extra space. Fine for mild weather.
- Hex (e.g., Grand Trunk Air Bivy): covers the ends well while trimming weight. A great all-around compromise.
- Large rectangular or “winter” style: maximum coverage and privacy, best for long storms, heavier to carry.
What the specs actually mean
A 20-denier silnylon fly is light and strong but can stretch when wet, so you’ll re-tension after rain starts. Polyester flies sag less but weigh more. A hydrostatic-head number like 2000mm is plenty for most three-season rain; higher ratings matter more for long, wind-driven storms.
Pitching tips
- Pitch lower in rain and wind; pitch higher and wider in heat for airflow.
- Stake the side wings out at an angle to shed water and block gusts.
- Leave one side slightly open to reduce condensation.
The Kammok Mantis All-in-One Hammock Tent offers one of the roomier stock flies in this group, so it’s a good baseline if storms are common where you camp.
Staying Warm: Insulation for Your Hammock Camping Setup
Here’s what surprises almost every new hanger: a hammock can feel cold at 65°F. The culprit is compression. When you lie in a sleeping bag, your body weight crushes the insulation underneath, so it barely traps heat — and in a hammock, air moves freely underneath you, stealing even more warmth.
Your three main options
Closed-cell or inflatable pad. The cheapest fix. It works, but pads tend to slide around inside a hammock. Wider pads or “pad sleeves” help.
Underquilt. A quilt that hangs outside and beneath the hammock, so your weight doesn’t compress it. It’s the gold standard for comfort, but adds cost — typically $100 or more for a quality three-season model.
Integrated pads. Lay-flat designs like the Haven Tent XL include a pad, which simplifies everything.
Matching insulation to season
For warm summer nights above about 70°F, many campers get by with a thin pad or nothing. In spring and fall, plan on an underquilt or a solid pad plus a top quilt. Kammok hammocks, including the Kammok Mantis All-in-One Hammock Tent, have perimeter loops designed to work with the brand’s underquilts — a nice, thoughtful compatibility detail.
Bottom line: budget insulation into your total cost from day one, or your “cheap” shelter will cost you sleep.
Common Mistakes to Avoid When Buying a Hammock Tent
Even savvy shoppers trip over these. Spotting them before checkout can save you a return.
Ignoring what’s not in the box. Many listings show a tarp and straps in photos that are actually sold separately. Read the “included components” line carefully.
Buying for capacity alone. A 500-pound rating doesn’t mean two adults will sleep comfortably. Capacity is a safety number, not a comfort number.
Underestimating your height. Tall campers in short hammocks end up with feet jammed against the end. Hennessy, for example, rates the Hennessy Hammock Expedition Asym Zip for users up to about 6 feet.
Skipping insulation. As covered above, a hammock without bottom insulation can be cold even in mild weather.
Choosing rope over webbing. Thin rope can damage bark and is banned in many parks. Wide straps are faster and more responsible.
Forgetting to practice. A hammock tent setup you’ve never tried at home is a hammock tent setup you’ll fight in the dark.
Assuming more features = better. Extra pockets and poles add weight. Choose features that solve problems you actually have.
Avoid these seven and you’re already ahead of most first-time buyers.
Long-Term Cost and Maintenance
Sticker price is only part of the story. Here’s a realistic look at total cost of ownership for a three-season setup.
| Kit | Shelter Price Range | Likely Add-Ons | Approx. Total | Best for |
|---|---|---|---|---|
| Sunyear Hammock with Rain Fly and Net | $50–$90 | Foam pad ($20–$40) | $70–$130 | Sunyear Hammock with Rain Fly and Net: casual campers |
| ENO JungleNest Hammock | $100–$120 | Straps + tarp ($80–$130), underquilt | $180–$350+ | ENO JungleNest Hammock: modular upgraders |
| Kammok Mantis All-in-One Hammock Tent | $230–$320 | Underquilt ($100+) | $330–$450 | Kammok Mantis All-in-One Hammock Tent: frequent backpackers |
| Haven Tent XL | $340–$400 | Usually none | $340–$400 | Haven Tent XL: comfort-first campers |
The takeaway: the Haven Tent XL looks expensive at first, but because the pad is included, its total cost lands close to a fully kitted mid-range system. Meanwhile, the ENO JungleNest Hammock can become one of the pricier routes once you add everything — though you gain flexibility to upgrade piece by piece.
Maintenance that extends lifespan
- Dry everything before storage. Mildew ruins nylon and coatings.
- Hand wash or gentle-cycle wash hammock bodies per manufacturer instructions; never machine-dry coated tarps.
- Inspect stitching and carabiners each season, especially near suspension points.
- Store loosely in a breathable bag, not compressed in a stuff sack long term.
Safety, Regulations, and Tree-Friendly Hanging
Before your next trip, check local rules — they vary a lot, and some urban parks ban tree hammocks entirely.
What state parks typically require
Minnesota’s state park system offers one of the clearest examples. Its hammocking rules require trees at least 12 inches in diameter at the attachment point, straps at least 1 inch wide, and only one hammock per tree — no stacking or “wheel spoke” setups. Those are smart defaults wherever you camp.
Wisconsin’s state parks go a step further: their hammock and slackline rules require padding around the trunk at the anchor point, with straps at least 1 inch wide lying flat against it, and prohibit altering trees with screws, nails, or anchors.
Personal safety checklist
- ✅ Check overhead for dead limbs (“widow-makers”) before hanging.
- ✅ Never hang from dead trees, posts, or structures not designed for loads.
- ✅ Keep sit height low, especially over rocks or slopes.
- ✅ Inspect carabiners for gate damage; use load-rated hardware (look for a kN rating).
- ✅ Respect the weight limit — including gear and insulation.
- ✅ Take your hammock down when you leave camp so wildlife doesn’t get tangled.
When in doubt, call the ranger station ahead of time. A two-minute call beats a citation or an unexpected night on the ground.
FAQs
❓ What is the best hammock tent for beginners?
❓ Are hammock tents worth the money?
❓ How much does a good hammock tent cost?
❓ Can two people sleep in one hammock tent?
❓ Can you set up a hammock tent without trees?
Conclusion: Your Best Hammock Tent Setup Starts Here
A great night in the trees isn’t luck — it’s a good shelter matched to how you sleep, hung with the right angle, protected by the right tarp, and insulated from below. Nail those four pieces, and hammock camping becomes one of the most comfortable ways to sleep outdoors.
If you want a low-risk way to start, the Sunyear Hammock with Rain Fly and Net gives you everything in one bag for a modest price. If you’re a backpacker who wants one purchase that just works, the Kammok Mantis All-in-One Hammock Tent hits the sweet spot of weight, coverage, and simplicity. Side sleepers who’ve given up on hammocks should seriously consider the Haven Tent XL, while anyone who camps where trees come and go will appreciate the Lawson Blue Ridge Camping Hammock‘s ground-tent backup. The ENO JungleNest Hammock, Hennessy Hammock Expedition Asym Zip, and Grand Trunk Air Bivy each fill smart niches in between — modular bug protection, asymmetric comfort, and big-and-tall capacity.
Whatever you choose, practice your hammock tent setup at home, aim for that 30-degree hang, respect tree-protection rules, and bring insulation. Do that, and your next campsite won’t be a compromise — it’ll be the best bed in the forest.
🌲 Ready to sleep above the ground? Make your move!
🔍 Click any highlighted product above to check current pricing and availability, then pick the hammock tent that fits your trips, your budget, and the way you sleep. Your best night outdoors is just one setup away! ⚡
Recommended for You
- Chair Hammock Frame Guide: 7 Best Stands That Won’t Wobble (2026)
- Free Standing Hammock Chair: 7 Best Picks That Actually Last (2026)
- Free Standing Hammock Chair Stand: 7 Best Rock-Solid Picks (2026)
Disclaimer: This post contains affiliate links. As an Amazon Associate, I earn from qualifying purchases made through these links, at no additional cost to you.
✨ Found this article helpful? Share it with someone who needs it! 💬🤗