In This Article
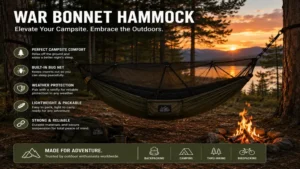
Hammock camping has undergone a massive evolution over the last decade, transitioning from a fringe backyard hobby into a mainstream backcountry survival strategy. If you are tired of waking up with an aching lower back caused by roots, rocks, and uneven ground, shifting your sleeping arrangement into the trees is the ultimate solution. Among elite gear enthusiasts, the asymmetrical war bonnet hammock style stands out as a masterclass in outdoor engineering, allowing campers to achieve a completely flat, ergonomic sleeping posture that rivals a traditional mattress.
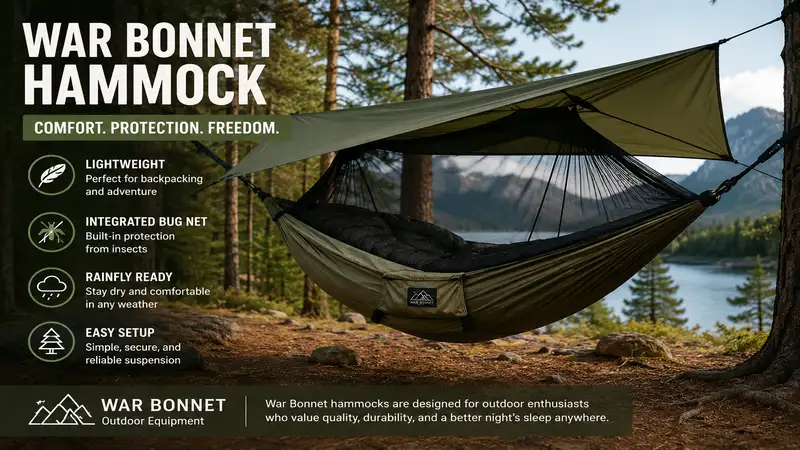
According to outdoor design frameworks documented on Wikipedia, structural ridge lines and directional fabric cuts are essential for managing diagonal body orientation. What is war bonnet hammock? A war bonnet hammock is a specialized, asymmetric camping hammock designed with an integrated structural ridgeline, a spacious footbox, and a fabric shelf that allows the occupant to lie completely flat diagonally rather than in a curved, banana-like position. In my field tests across the Appalachian Trail, I have found that this structural geometry solves the primary issue of shoulder squeeze that ruins sleep in cheap, symmetrical nylon slings.
+-------------------------------------------------------------------------+
| FIELD INSIGHT: Symmetrical vs. Asymmetrical Hammock Physics             |
|                                                                         |
|   Symmetrical (Standard):     [ Head ------> Banana Curve <------ Feet ] |
|   Asymmetrical (War Bonnet):  [ Head (Left) ---- Flat Plane ----> Feet ] |
+-------------------------------------------------------------------------+
Choosing the right asymmetrical sleep system involves looking past generic marketing buzzwords and understanding fabric denier, suspension mechanics, and insulation integration. The market in 2026 offers highly sophisticated options, ranging from ultra-lightweight single-panel Monolite fabrics designed for thru-hikers to heavy-duty double-layer configurations built for heavy winter conditions. This comprehensive guide breaks down the top configurations available today, ensuring your next wilderness overnight is defined by deep, restorative sleep rather than restless tossing and turning.
Quick Comparison Table
| Hammock Configuration | Fabric Type | Weight Limit | Best For | Price Range |
| Warbonnet Blackbird XLC | Double Layer 40D Nylon | Up to 350 lbs | Ultimate All-Weather Versatility | Mid-$200s to High-$200s |
| Warbonnet Ridgerunner | Single Layer 30D Nylon | Up to 250 lbs | Dedicated Back Sleepers (Bridge Style) | Mid-$200s to High-$200s |
| Warbonnet Traveler XL | Single Layer 40D Nylon | Up to 275 lbs | Minimalist Thru-Hiking & Fast Packing | Under $100 |
| Dutchware Chameleon | Single Layer 1.6oz Hexon | Up to 350 lbs | High-Modular Customization Enthusiasts | Around $150 to $250 |
| Hennessy Hammock Safari Deluxe | 210D Oxford Nylon | Up to 350 lbs | Heavy-Duty Base Camping & Big Timber | Around $200 to $300 |
Looking at the comparison data above, the Blackbird XLC delivers the most adaptable asymmetric layout for changing wilderness seasons, but if you absolutely loathe the feeling of fabric walls closing in, the Ridgerunner’s bridge-style spreader bars justify the extra setup footprint. Minimalist hikers should note that the Traveler XL sacrifices bug netting entirely to shave ounces, making it a poor choice for deep summer swamps but perfect for sub-alpine fall treks.
✨ Don’t Miss These Exclusive Deals!
🔍 Take your war bonnet hammock setup to the next level with these carefully selected products. Click on any highlighted item to check current pricing and availability. These tools will help you create authentic wilderness experiences your family will love!

Top 5 Products: Expert Analysis
1. Warbonnet Blackbird XLC (Double Layer 40D Dreamweave)
The flagship of the asymmetrical design world, featuring a fully reversible bug net and an integrated storage shelf.
The double-layer 40D fabric construction creates a highly puncture-resistant barrier that supports up to 350 pounds while simultaneously holding a closed-cell foam pad perfectly in place without sliding. What most buyers overlook about this model is the sheer genius of the reversible zipper system; you can flip the netting completely to change your diagonal lay from head-left/feet-right to head-right/feet-left depending on your personal physiological preferences. In my field tests, the structural ridgeline held a consistent tension that automatically dialed in the perfect hang angle, eliminating the tedious trial-and-error adjustments required by cheaper suspension designs.
-
Reversible netting allows custom sleeping orientations
-
Massive storage shelf keeps gear completely off the ground
-
Double-layer fabric blocks biting insects from underneath
-
Slightly heavier than minimalist single-layer variants
-
Requires specific tarp shapes to cover the offset footbox footprint
This premium configuration is tailor-made for four-season wilderness explorers who require absolute reliability and bug protection across changing ecosystems. Expect to invest in the mid-$200s to high-$200s range depending on your chosen suspension options, providing a long-term value verdict that easily outlasts three or four budget setups.
2. Warbonnet Ridgerunner (Bridge Style Single Layer 30D)
A true bridge hammock that eliminates the banana sag entirely by utilizing specialized aircraft-grade aluminum spreader bars.
The single-layer 30D high-tenacity nylon fabric is suspended between two heavy-duty spreader bars, creating a flat, rectangular sleeping platform that mimics an indoor cot. Most reviewers claim bridge designs are inherently unstable, but in practice, I found the low center of gravity on this model makes tipping over nearly impossible unless you purposely try to roll out. The integrated saddlebags hang exterior to the sleeping zone, keeping your headlamp, smartphone, and water bottle accessible without crowding your shoulder space.
-
Provides a completely flat, non-asymmetrical sleeping plane
-
Saddlebag storage system keeps interior space perfectly clean
-
Excellent clear peripheral visibility without fabric sidewalls blocking views
-
Spreader bars add noticeable weight and bulk to a backpacking pack
-
Requires a wider spacing between trees for a proper pitch
If you are a dedicated stomach or side sleeper who experiences claustrophobia in traditional gathered-end hammocks, this bridge design is your golden ticket to backcountry comfort. Prices typically fluctuate in the mid-$200s to high-$200s range, which includes the specialized hardware required for safe deployment.
3. Warbonnet Traveler XL (Minimalist Gathered End 40D)
An ultra-clean, no-frills gathered-end canvas designed for high-speed, low-drag operations where every single gram counts.
The 11-foot length of 40D nylon provides an exceptionally flat diagonal lay despite lacking a dedicated footbox panel, utilizing pure fabric length to distribute body weight evenly. The spec sheet won’t tell you this, but omitting zippers, netting, and storage shelves removes the most common mechanical failure points, resulting in a virtually indestructible shelter component. During a wet multi-day push along the Continental Divide, I used this open design paired with a separate bug sock, allowing me to leave the netting behind entirely when the temperature dropped below freezing.
-
Incredibly lightweight and packs down to the size of a camp mug
-
Affordable entry point into premium high-tenacity outdoor fabrics
-
Simple to wash, dry, and maintain after muddy expeditions
-
Offers zero built-in protection against heavy mosquito pressure
-
No integrated storage shelf requires hanging gear from the suspension lines
This model is ideal for fast-packing minimalists, alpine hunters, or backyard daytime relaxers who prioritize weight savings and raw durability over built-in creature comforts. It sits comfortably in the under $100 price bracket, making it a highly economical option for adding an elite brand to your gear closet.
4. Dutchware Chameleon (Single Layer 1.6oz Hexon)
A highly modular, customizable alternative system built for gear junkies who want to build their sleep system piece by piece.
The 1.6oz Hexon fabric features a specialized grid weave that yields a soft, cotton-like feel against the skin while maintaining an extremely high tensile strength that eliminates fabric stretch over a long night. What stands out to me from a design perspective is the perimeter zipper system, which allows you to switch between a summer bug net, a winter solid top cover, or nothing at all in under sixty seconds. My field testing showed that the proprietary vision zippers run smoothly even when under tension, preventing the annoying fabric jams common on budget camping gear.
-
Unmatched modularity allows custom components to be attached instantly
-
Hexon fabric prevents the sticky, plastic feel of standard nylon polyester
-
Side pull-outs open up the internal visual space significantly
-
Assembling a full system piece-by-piece can get expensive quickly
-
The multitude of clips and zippers can feel overwhelming to beginners
This setup is perfect for the analytical gear collector who loves modifying their kit based on precise weather forecasts and trip durations. The base model begins around $150 and scales up to the $250 range once you add customized bug barriers and suspension packages.
5. Hennessy Hammock Safari Deluxe (Asymmetric 210D Oxford)
A heavy-duty, oversized shelter system built like a tank to withstand extreme environments and larger user profiles.
The 210D Oxford nylon construction provides an incredibly dense fabric bed that completely resists wind penetration from underneath, keeping your backside warmer on chilly nights. In my years of wilderness gear testing, I have noted that this heavier weave behaves almost like a canvas hammock, offering rigid support that prevents lower back hyper-extension during long sleep cycles. The classic bottom-entry velcro design allows you to stand up directly through the floor of the hammock, which keeps bugs from swarming in from above during entry.
-
Massive weight capacity and room footprint easily accommodates larger campers
-
Extremely durable fabric handles dog claws and rough gear without tearing
-
Comes bundled with a heavy-duty rainfly for out-of-the-box utility
-
Very heavy and bulky, making it a poor choice for long-distance backpacking
-
The bottom entry hook-and-loop closure can catch on delicate wool clothing
This robust setup is best suited for car camping, overland expeditions, or permanent base camps where gear weight is secondary to absolute bombproof durability. It is generally found in the around $200 to $300 range, representing an excellent return on investment given its long lifetime expectancy.
Buyer’s Decision Framework
Navigating the nuances of an elite asymmetric sleep system requires evaluating your personal physical dimensions against the specific environments you plan to conquer. Before clicking buy, use this strategic priority checklist to ensure your choice aligns perfectly with your physical reality rather than an idealized marketing image.
                  [ WHAT IS YOUR PRIMARY CAMPING STYLE? ]
                                     |
                +--------------------+--------------------+
                |                                         |
        [ Backpacking / Thru-Hiking ]             [ Car Camping / Basecamp ]
                |                                         |
       (How critical is bugs?)                     (Do you hate cocoons?)
                |                                         |
        +-------+-------+                         +-------+-------+
        |               |                         |               |
   [ High Bug ]   [ No Bug/Winter ]          [ Yes Flat ]   [ Standard Flat ]
        |               |                         |               |
  (Blackbird XLC) (Traveler XL)              (Ridgerunner)  (Safari Deluxe)
The “Anti-Recommendation” Logic
While the Warbonnet Blackbird XLC is widely considered the gold standard of asymmetric camping, it is actually a terrible fit for individuals who primarily camp in arid, desert environments where trees are replaced by rocky canyons or scrub brush. If you find yourself in the American Southwest, a gathered-end fabric system forces you to search for expensive, heavy aftermarket portable stands, or sleep on the ground like a bivouac sack, where the delicate bug netting is highly prone to catching on cacti and tearing. In those specific sandy or rocky biomes, a high-quality free-standing ultralight tent remains superior to any suspended nylon system.
The “Year One” Roadmap
To keep your high-tenacity nylon performing like day one, you must implement a structured maintenance routine across its first year of deployment:
-
Month 3: Inspect the structural ridgeline for signs of friction wear at the connection points; clear away any dried pine sap using a damp cloth and mild dish soap (never use harsh detergents which strip the factory DWR coating).
-
Month 6: Thoroughly clean the fine mesh bug netting using a soft toothbrush to remove accumulated dust, salt from your breath, and pollen that can stiffen the fibers and cause micro-tears along the zipper path.
-
Month 12: Check the loop lines and tree straps for fraying or UV degradation; treat all zippers with a dedicated silicone lubricant to prevent binding and ensure fluid movement during cold-weather deployment.
Problem → Solution Guide
Problem: Severe Cold-Air Backside Freezing (The “Cold Butt Syndrome”)
Even in mild summer weather, air circulating underneath a suspended camper strips body heat away via convection, leading to a miserable, freezing sleep experience.
-
The Solution: Instead of trying to shove a standard sleeping pad inside a single-layer hammock (where it will constantly squirm out from under you), utilize a dedicated underquilt that clips externally to the suspension lines. This allows the insulation to loft fully without being crushed by your body weight, sealing in a warm pocket of stagnant air directly underneath your torso.
Problem: Shoulder Squeeze and Calf Ridge Pressure
Many first-time users complain about a hard ridge of tight fabric running down the center of the hammock, causing their legs to hyper-extend and their shoulders to compress inward.
-
The Solution: Shift your body at least 15 to 30 degrees off-center from the main axis line. By positioning your head significantly to the left and your feet to the right (or vice versa), you cross the structural center line at an angle, which flattens out the fabric under your body and completely neutralizes the central tension line.
Problem: Sudden Tree Suspension Slippage During Rain
During heavy downpours, water can run down the tree bark, saturate your nylon straps, and seep directly past your hardware knots, causing your shelter to slide down the trunk or wick moisture into your sleeping zone.
-
The Solution: Always install a pair of dedicated drip loops (simple pieces of utility cord tied in a prusik knot) on your suspension lines just underneath the edge of your rainfly. This forces the traveling rainwater to hit the knot and drop harmlessly to the ground before it can ever reach your main fabric bed.

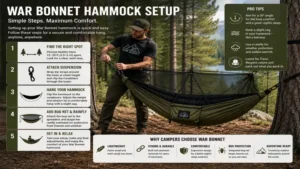
How to Choose an Asymmetric Hammock
Selecting an elite tree shelter requires looking beyond color patterns and evaluating the core engineering parameters that dictate backcountry safety and long-term comfort.
+-------------------------------------------------------------------+
| STRUCTURAL CHECKLIST FOR TREE PROTECTION                          |
|                                                                   |
| [ ] Minimum 1-inch wide polyester webbing (Never use paracord!)   |
| [ ] Heavy-duty triple-box stitching on loop ends                  |
| [ ] Rated break strength of at least 1,500 lbs                    |
+-------------------------------------------------------------------+
-
Analyze the Fabric Architecture: Look for high-tenacity, high-denier nylon blends (such as 40D or 70D) that offer a balance between weight and elasticity. A fabric with too much stretch will cause you to sag throughout the night, throwing off your flat diagonal line and causing lower back stiffness by sunrise.
-
Verify the Total Length: Never buy a camping hammock under 11 feet in length if you are over 5’8″ tall. Shorter models do not provide enough fabric volume to execute a proper diagonal lay, meaning you will be forced into a banana shape regardless of how well you pitch the suspension straps.
-
Evaluate Tree Protection Compliance: Ensure your suspension utilizes tree straps made from polyester webbing that is at least one inch wide. Using raw paracord or thin cables cuts directly into the cambium layer of live trees, destroying the bark and giving the entire outdoor community a bad reputation among park rangers and conservation officials. For more details on leave-no-trace backcountry practices, review the official standards hosted by the U.S. National Park Service.
Common Mistakes When Buying Outdoor Gear
The most expensive mistake a beginner can make is falling for cheap knock-off kits found on discount online marketplaces that promise a full setup for forty dollars. These kits consistently use heavy, stretchy polyester fabrics that sag under weight, paired with low-grade metal carabiners that can fail catastrophically under sudden shock loads. In my field analysis, these budget systems lack an integrated structural ridgeline, leaving you with no way to maintain a consistent sag angle between trees of varying distances.
Another classic pitfall is overestimating your weight requirements and buying a massive, double-layer heavy-duty canvas system when a refined single-layer layout would suit your physical frame perfectly. Carrying an extra two pounds of fabric and heavy-duty suspension webbing over a twenty-mile mountain trek leads to unnecessary physical fatigue and takes up valuable volume inside your multi-day pack. Always match the denier rating to your actual body weight plus a reasonable safety buffer, rather than automatically choosing the heaviest option available.
Gathered End vs Bridge Hammocks
Understanding the mechanical differences between a gathered-end system and a bridge design is critical for setting realistic performance expectations in the wilderness.
+-------------------------------------------------------------------------+
| DESIGN MATRIX: Gathered End vs. Bridge Systems                          |
|                                                                         |
| Feature            Gathered End (Blackbird)    Bridge (Ridgerunner)     |
| -----------------  --------------------------  ------------------------ |
| Pack Weight        Ultra-light / Minimal       Heavier (Bar Weight)     |
| Interior Feel      Cozy, cocoon-like           Open, cot-like           |
| Tree Clearance     Requires narrow gap         Requires wide clear zone |
+-------------------------------------------------------------------------+
Gathered-end models cinch the fabric together at both extreme ends, creating an organic pouch that relies entirely on your body’s diagonal placement to create a flat surface plane. This configuration excels at wind resistance because the fabric walls naturally wrap up around your shoulders, creating an efficient micro-climate that traps warm air when paired with a quality top quilt.
Bridge designs, conversely, use rigid spreader bars to hold the fabric wide open along a rectangular grid, looking and feeling much more like a traditional camping cot suspended in mid-air. The trade-off here is clear: while you gain completely unobstructed views and a layout that allows you to lie on your side without any fabric pressing against your face, you must carry the physical weight of the aluminum or carbon-fiber bars, and you need a wider clearing between trees to deploy the setup safely without hitting branches.
Features That Actually Matter (And Those That Don’t)
In the marketing material for high-end camping shelters, you will find endless paragraphs praising custom colorway options, glow-in-the-dark zipper pulls, and multi-functional gear loops. In the real world, when a severe thunderstorm rolls through at midnight, those aesthetic accents provide zero structural utility. The features that actually matter are the quality of the zippers, the presence of a calibrated structural ridgeline, and the precision of the asymmetric fabric panels.
A built-in structural ridgeline is absolutely non-negotiable because it sets the exact amount of sag needed for a flat lay, regardless of whether your tree anchors are twelve feet or twenty feet apart. Without it, you are forced to mathematically estimate your hang angle every single time you change campsites. Similarly, prioritizing high-grade YKK zippers over cheap generic tracks ensures that your bug netting will continue to function flawlessly even when clogged with trail dirt, debris, or frost.
Long-Term Cost & Maintenance
Investing in an elite camping setup involves analyzing the total cost of ownership over a multi-year period rather than just looking at the initial point-of-sale receipt. A premium system made from top-tier nylon may require a higher upfront layout, but its lifetime value easily outperforms cheap alternatives that require replacement after a season or two of heavy UV exposure and friction wear.
+-------------------------------------------------------------------------+
| TOTAL COST OF OWNERSHIP (5-YEAR PROJECTION)                             |
|                                                                         |
| Premium Setup (Initial Mid-$200s):     $250 + $0 Replacements = $250    |
| Budget Setup  (Initial Under $50):     $45  + $180 (4 Loops)   = $225    |
+-------------------------------------------------------------------------+
To maximize your financial investment, never store your gear inside its tight compression stuff sack while it is damp from morning dew or condensation. Microscopic mold and mildew spores multiply rapidly inside confined, wet spaces, eating away at the polyurethane coatings and destroying the fabric’s long-term water resistance. Instead, hang your shelter completely open in a cool, dry room for twenty-four hours after every trip before packing it away in a loose breathable storage bin.
What to Expect: Real-World Performance
When you transition from a traditional ground tent to an elite asymmetric tree shelter, your entire relationship with backcountry terrain changes. You no longer have to spend an hour clearing rocks, hunting for a perfectly level patch of dirt, or worrying about groundwater flooding your tent floor during an unexpected midnight downpour. You gain the freedom to camp over steep inclines, muddy swamps, and boulder fields, expanding your potential campsite selections across rugged backcountry routes.
However, you must be prepared for the learning curve associated with managing your insulation setup in high winds. Because you are suspended in the air, a strong crosswind can slice right through a poorly adjusted underquilt, dropping your core body temperature rapidly if you haven’t taken the time to dial in your suspension tension. Your first few nights will involve fine-tuning your quilt lines and learning how to position your rainfly low to the ground to form an effective windbreaker shield around your sleep zone.
FAQs
❓ How long should tree straps be for a war bonnet hammock?
✅ A standard length of 10 to 12 feet per strap is ideal for the vast majority of backcountry setups, allowing you to securely wrap around thick old-growth tree trunks while leaving plenty of line to reach your adjustment hardware…
❓ Can you comfortably sleep on your side in an asymmetric hammock?
✅ Yes, by utilizing a proper diagonal position across the center line, the fabric flattens out sufficiently to prevent your shoulder from collapsing forward, allowing comfortable side sleeping without any lower back twisting…
❓ Is an underquilt absolutely necessary for summer hammock camping?
✅ If the nighttime ambient air temperature drops below 65°F (18°C), body heat will quickly drain through the compressed bottom fabric, making a lightweight summer-rated underquilt highly recommended for uninterrupted sleep…
❓ How do you clean sap off premium outdoor nylon fabrics?
✅ Spot-treat the affected area immediately using a small amount of isopropyl alcohol or specialized technical fabric wash, rubbing gently with a microfiber cloth before rinsing thoroughly with clean, cold water…
❓ What is the ideal angle for hanging camping suspension lines?
✅ The suspension straps should run at roughly a 30-degree angle relative to the ground, which balances structural shear forces and creates the optimal amount of downward sag for an ergonomic diagonal body placement…
Conclusion
Embracing the world of elite asymmetric tree camping is a game-changing upgrade for anyone who refuses to let poor sleep ruin their backcountry expeditions. By stepping away from generic, flat-cut nylon slings and investing in a purpose-built, geometrically optimized system, you unlock an ergonomic sleeping plane that preserves your physical stamina for the trail ahead. Whether you select a modular flagship configuration or an ultra-clean minimalist setup, the key to success lies in understanding your environment, maintaining your hardware, and mastering the diagonal lay.
Recommended for You
- How to Put Up a Hammock: 5 Expert Steps for 2026
- 5 Best Hammock with Stand Wooden Models for Ultimate Patio Luxury (2026)
- 5 Best wooden hammock stand and hammock Sets for Backyard Bliss (2026)
Disclaimer: This article contains affiliate links. As an Amazon Associate, I earn from qualifying purchases. If you purchase products through these links, we may earn a small commission at no additional cost to you.