
In This Article
Hammock Posts DIY in 2026: Why Your Backyard Doesn’t Need Trees
You’ve got the hammock. You’ve got the lazy Sunday planned. What you don’t have is two healthy trees standing exactly 15 feet apart in the one sunny corner of your yard. Sound familiar? That’s precisely why hammock posts diy projects have become one of the most searched weekend builds in American backyards — and why so many of them end up leaning like the Tower of Pisa by the second summer.
Here’s the thing most tutorials skip: a hammock doesn’t just push down on a post. It pulls sideways — hard. At a typical 30-degree hang angle, basic trigonometry says each suspension line carries tension roughly equal to the full weight of whoever is lying in the hammock. A 200-pound adult drops a fresh 200 pounds of pull on each post, most of it horizontal, and that’s before anyone flops in with a bounce. So a successful hammock posts diy build isn’t about lumber alone. It’s about the right hole, the right concrete, the right hardware, and the right finish.
What Is Hammock Posts DIY?
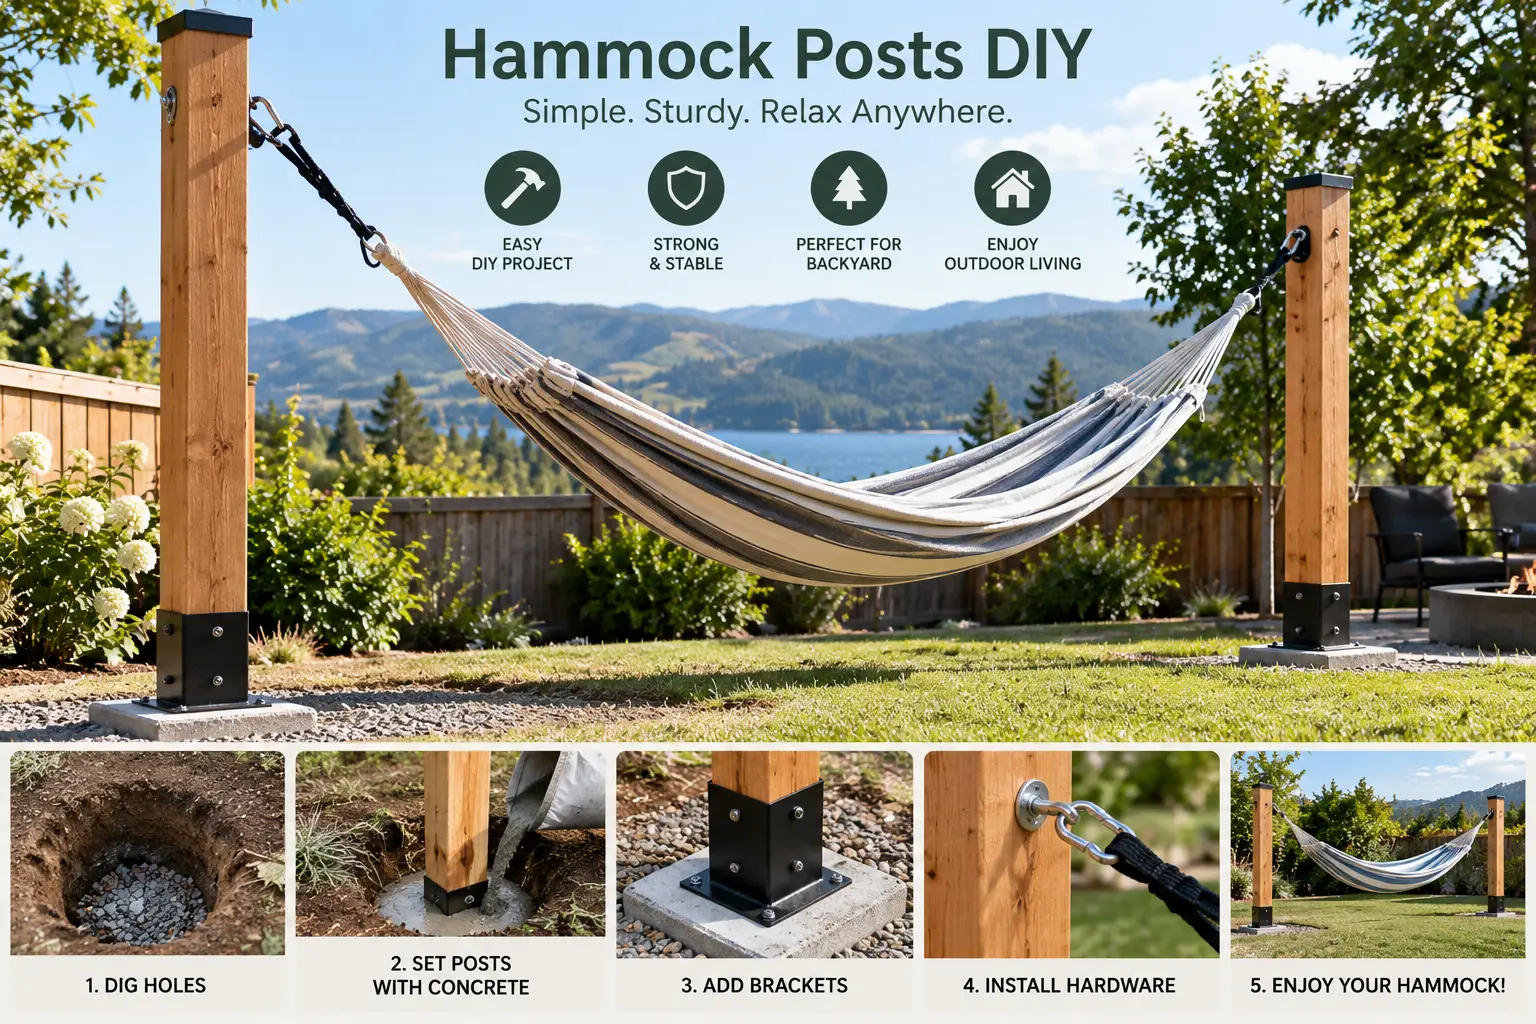
Hammock posts diy is the process of building your own freestanding hammock supports by setting two ground-contact wooden posts (usually 4×6 or 6×6 pressure-treated lumber) deep into concrete, spaced to match your hammock’s length, and fitting them with rated eye bolts or a hanging kit so the hammock can hang safely without trees or a steel stand.
Before a single shovel hits the dirt, though, you’ll want to follow the advice of utility companies and local governments and call 811 before you dig — it’s free, and it’s the difference between a relaxing project and a severed gas line.
In this guide, you’ll find the seven products that actually make or break the build (from digging to sealing), plus depth and spacing numbers, a step-by-step installation walkthrough, and honest cost math.
Quick Comparison: The 7 Hammock Posts DIY Essentials at a Glance
| Product | Role in the Build | Typical Price Range | Best for |
|---|---|---|---|
| Fiskars 60″ Steel Posthole Digger | Digging deep, narrow holes | Around $50–$80 | Fiskars 60″ Steel Posthole Digger: clay or rocky soil |
| Johnson Level 175-O Post & Pipe Level | Keeping posts plumb | Under $15 | Johnson Level 175-O: solo builders |
| QUIKRETE Fast-Setting Concrete Mix (No. 1004) | Anchoring posts | Roughly $8–$15 per bag in stores (online listings vary widely) | QUIKRETE Fast-Setting: one-day installs |
| Koch 105140 Forged Eye Bolt, 1/2″ x 10″ | Through-bolt hang point | Under $25 | Koch 105140: maximum strength |
| Abimars M10 316 Stainless Eye Bolts (4-pack) | Screw-in hang points | Around $15–$30 | Abimars M10: coastal/humid climates |
| Vivere Chain Hanging Kit | Adjustable chain + hooks | Around $20–$35 | Vivere Chain Hanging Kit: spreader-bar hammocks |
| Green Products Copper-Green Brown Wood Preservative | Sealing cut ends | Around $15–$30 per quart | Copper-Green Brown: longevity on cut posts |
Looking at the table, notice that the two cheapest items — the Johnson Level 175-O and a few bags of QUIKRETE Fast-Setting — do the most to prevent the classic failure (a post that sets crooked or loosens). The Koch 105140 and Abimars M10 solve the same problem in different ways: the Koch through-bolt is the strength play, while the Abimars stainless screws trade some ultimate capacity for corrosion resistance and easier installation.
💬 One click helps other shoppers make an informed choice too! 😊 Tap any highlighted product to check current pricing and availability.
Top 7 Products for Your Hammock Posts DIY Build: Expert Analysis
Every product below was chosen because it fills a specific job in the build sequence — dig, align, anchor, attach, protect. Specs come from manufacturer data; review sentiment is aggregated from real retailer listings where it could be verified, and flagged where it couldn’t.
1. Fiskars 60″ Steel Posthole Digger — deepest reach for tough soil
The Fiskars 60″ Steel Posthole Digger (model 96536935J) earns its spot by solving the most physically punishing step: getting a clean hole three-plus feet deep.
Fiskars builds it from welded 14-gauge steel blades and 16-gauge steel shafts with a welded pivot joint, so there are no nuts or bolts to loosen. In practice, that means the tool doesn’t flex when you’re prying out a clay plug at 30 inches — a real advantage over wood-handled diggers that bow and fiberglass handles that spring back. The offset handle design is the clever part: Fiskars says it lets you dig up to 12 inches deeper than traditional models while keeping your knuckles off the hole’s edge. With a 6.5-inch blade spread, you’ll widen the hole slightly with extra passes for a 6×6 post.
Based on comparing the specs, this is the digger for anyone setting posts in dense or rooty soil where a 36–42 inch depth is non-negotiable. If you live on sand, a cheaper clamshell digger will do fine.
Reviews on major US retailers consistently praise the sharp blades, the all-steel durability, and the knuckle protection; the most common complaints are the tool’s weight and, in a minority of reports, wear at the pivot point over heavy use.
Pros:
- ✅ Welded steel pivot never loosens or rattles
- ✅ Offset handles reach roughly a foot deeper
- ✅ Sharpened blades bite into compacted clay
Cons:
- ❌ Noticeably heavy after a dozen lifts
- ❌ Some owners report pivot wear under abuse
Usually priced around $50 to $80 at the time of writing (check the current price) — strong value, since renting a power auger for a day often costs about as much.
2. Johnson Level 175-O Post & Pipe Level — hands-free plumb checks
The Johnson Level 175-O Post & Pipe Level is the cheapest item in this guide and arguably the one that saves the most projects.
It’s a molded plastic body bent at 90 degrees with three acrylic vials that read plumb on two faces at once, plus a rubber strap that holds it on the post. What that means in practice: you can shovel concrete with both hands while watching two bubbles instead of walking a 4-foot level around the post every 30 seconds. The reflective white backing makes the vials readable against dark, wet pressure-treated wood. One honest note: despite some listings’ titles, the 175-O is nonmagnetic, which doesn’t matter for wood posts at all.
Here’s what most buyers overlook: plumb matters more with hammock posts than with fence posts, because a post that starts leaning 1 degree toward the hammock only gets worse under load. For solo builders, the Johnson Level 175-O is the closest thing to a second pair of hands.
Aggregated reviews repeatedly mention that readings match a full-size framing level and that the bright orange body is easy to find in grass; the recurring complaints are that the rubber strap wears out and that vials can fade if left in the sun.
Pros:
- ✅ Reads two plumb faces at the same time
- ✅ Strap frees both hands for pouring
- ✅ Bright orange body is hard to lose
Cons:
- ❌ Rubber strap degrades over time
- ❌ Vials may fade after long sun exposure
Typically under $15 — outstanding value; buy two so each post gets its own level during the pour.
3. QUIKRETE Fast-Setting Concrete Mix (No. 1004) — posts set in 40 minutes
QUIKRETE Fast-Setting Concrete Mix turns a two-day job into a one-afternoon job without sacrificing strength.
According to the manufacturer’s technical data sheet, it’s a blend of fast-setting cements, sand, and gravel that sets hard in approximately 20 to 40 minutes, and you should wait 4 hours before putting any strain on a post. Better still for DIYers, it can be dry-poured: fill the hole with mix, soak it with water, no wheelbarrow required. Each 50-lb bag yields roughly 0.375 cubic feet, so a 12-inch-wide, 42-inch-deep hole around a 6×6 usually needs four to five bags.
On paper, “4 hours” is the minimum for general strain. For a hammock, which loads the post sideways with bouncing adults, a more conservative choice is waiting 24–72 hours before the first real test swing.
Honestly, verifiable review data for Amazon listings of this bag is thin — it’s a commodity product sold mostly in stores, and online listings vary a lot in price because of shipping weight. What is well-documented is its long-standing use for fence, mailbox, and swing-set posts.
Pros:
- ✅ Dry-pour method skips mixing entirely
- ✅ Sets hard in under an hour
- ✅ Ready for light strain after four hours
Cons:
- ❌ Heavy bags make online shipping costly
- ❌ Short working time punishes slow pours
Usually roughly $8–$15 per bag at big-box stores, often more online (prices may vary) — excellent value; buying locally typically beats shipping.
4. Koch 105140 Forged Eye Bolt, 1/2″ x 10″ — strongest through-bolt option
The Koch 105140 Forged Eye Bolt is the hang point you choose when you want strength margin measured in thousands of pounds, not hundreds.
It’s a drop-forged, hot-dipped galvanized steel eye bolt, 1/2 inch in diameter and 10 inches long, with a nut, rated at a 2,200-lb working load limit. Why that matters: a 10-inch bolt passes completely through a 6×6 (which actually measures 5.5 inches) with room for a large washer and nut on the back, so the load is carried by the whole post cross-section rather than by threads gripping wood fibers. Hot-dip galvanizing is also thicker than the zinc plating found on bargain-bin hardware — a big deal for bolts sitting in wet, copper-treated lumber.
One caveat grounded in the engineering: industry fastener guidance on forged eye bolt load limits notes that ratings assume a 5:1 safety factor and that standard (non-shoulder) eye bolts aren’t meant for angled lifts. A hammock pulls at roughly 30 degrees below the bolt’s axis, so you’re not using the full 2,200-lb figure — but you’re starting from an enormous cushion.
We couldn’t verify a meaningful pool of customer reviews for this exact listing, so this assessment rests on the published rating and construction.
Pros:
- ✅ Through-bolt design spreads load across post
- ✅ Hot-dipped galvanizing resists wet-lumber corrosion
- ✅ Huge rated margin over hammock loads
Cons:
- ❌ Requires a long 1/2-inch drill bit
- ❌ Not rated for angled loads at full capacity
Typically under $25 per bolt — top-tier value for the safety margin it buys.
5. Abimars M10 316 Stainless Eye Bolts (4-pack) — best for humid and coastal yards
The Abimars M10 316 Stainless Eye Bolts are the pick when rust is your enemy and you’d rather screw in a hang point than drill all the way through.
These are drop-forged from 316 marine-grade stainless steel, sold in a four-pack, and rated by the seller at 1,000 lbs when the pull is along the bolt’s axis. In practice, 316 stainless shrugs off salt air and the corrosive chemistry of treated lumber far better than zinc-coated steel, which matters if you live anywhere from the Gulf Coast to the Pacific Northwest. The four-pack also gives you spares — handy for a tarp ridgeline or a second hang height.
What the spec sheet quietly admits is important: the seller states that moving the line of force 20 degrees off-axis reduces the rating by 20%. At a 30-degree hammock angle, plan on well under the headline number. That’s still ample for one adult, but it’s why pre-drilling a correct pilot hole and driving the full thread length into solid wood is non-negotiable.
The seller’s own listing acknowledges that some reviewers reported bent or damaged bolts, attributing it to incorrect installation — a signal worth heeding rather than dismissing.
Pros:
- ✅ Marine-grade 316 stainless resists salt air
- ✅ Four-pack covers two posts plus spares
- ✅ No through-drilling needed for installation
Cons:
- ❌ Rating drops noticeably with off-axis pull
- ❌ Unforgiving of undersized or oversized pilot holes
Usually around $15–$30 for the pack — solid mid-range value for climates that eat plain steel.
6. Vivere Chain Hanging Kit — easiest height adjustment
The Vivere Chain Hanging Kit solves the problem nobody anticipates until the posts are already in concrete: getting the hang height exactly right.
Vivere’s kit includes two eye bolts with hooks, two chains of 14 links each, and two S-hooks, all zinc-coated to resist corrosion — and the company describes it as designed for hanging hammocks from trees or wooden posts. The practical payoff is the chain: every link is an adjustment step, so if your posts end up an inch taller or shorter than planned, you simply hook a different link. It’s the same hardware Vivere ships with its spreader-bar hammocks, which is exactly the hammock style it suits best.
Based on comparing the specs, this kit is ideal for beginners with a traditional rope or spreader-bar hammock who want a matched set. Heavier users or two-person hammocks may prefer pairing the kit’s chains with the Koch 105140 through-bolts for extra margin, since Vivere’s included bolts are lag-style.
Candidly, most of the Vivere reviews we could find relate to a different Vivere hook kit (with complaints about missing screws), so we can’t confirm a reliable review consensus for this chain kit specifically.
Pros:
- ✅ Fourteen links make height tuning effortless
- ✅ Complete matched set, nothing extra to buy
- ✅ Zinc coating handles normal outdoor weather
Cons:
- ❌ Zinc plating wears faster than stainless steel
- ❌ Chain can squeak without occasional lubrication
Typically around $20–$35 — good value for spreader-bar hammock owners who want a one-box solution.
7. Green Products Copper-Green Brown Wood Preservative — protects every cut end
Green Products Copper-Green Brown Wood Preservative is the insurance policy for the one spot pressure-treated lumber is weakest: wherever you cut or drilled it.
It’s a copper naphthenate preservative in a hydrocarbon solvent, applied by brush. Why it matters: factory treatment doesn’t penetrate all the way to the core of a thick post, so every saw cut and every eye-bolt hole exposes untreated wood. The manufacturer’s instructions state that ends or edges cut or bored after treatment must be brushed with preservative — and your bolt holes are exactly that. The brown tint also hides the green cast that copper gives, which looks better on a visible backyard feature.
Here’s what to weigh: it’s oil-based, it smells strongly at first, and cleanup takes mineral spirits. That’s why editorial testers at Family Handyman describe it as a good fit for exterior posts but a poor one indoors. If you prefer a clear-green finish, Rust-Oleum’s Woodlife CopperCoat is a comparable copper naphthenate alternative.
Published customer feedback for this product is limited on the listings we reviewed, so we’re leaning on manufacturer guidance and independent editorial coverage.
Pros:
- ✅ Treats exposed end grain and bolt holes
- ✅ Brown tint masks copper’s green cast
- ✅ Paintable afterward with oil-based primer
Cons:
- ❌ Strong solvent odor during application
- ❌ Messier cleanup than water-based sealers
Usually around $15–$30 per quart — excellent value, since one quart treats several projects’ worth of cuts.
✨ Don’t miss out on a rock-solid setup!
🔍 Take your backyard relaxation to the next level with this carefully curated toolkit. Click a highlighted item to check current pricing and availability. These picks will help you build hammock posts the whole family will enjoy for years!
Step-by-Step: How to Set Hammock Posts in Concrete
This is the heart of any hammock posts diy build, and it’s where the products above earn their keep. Follow the order — skipping ahead is how posts end up crooked.
1. Plan and mark
Measure your hammock and decide on spacing (see the depth and spacing section below). Mark both hole centers with stakes, then run a string between them to confirm they line up with where you’ll actually lie. Call 811 and wait for utility marks.
2. Dig deep and slightly bell-shaped
Use the Fiskars 60″ Steel Posthole Digger to dig roughly three times the post width — about 12 inches across for a 6×6 — and at least 36 inches deep, deeper if your local frost line demands it. Flare the bottom slightly wider than the top so the concrete plug resists pulling upward.
3. Add drainage
Pour 4–6 inches of compacted gravel into the bottom. This keeps the post’s end grain out of standing water — a leading cause of rot.
4. Set, brace, and plumb
Stand the post on the gravel, strap on the Johnson Level 175-O, and brace it with two scrap 2x4s staked at right angles. Tip: set each post leaning a hair away from the hammock (a degree or two), since load and soil settling tend to pull it inward.
5. Pour the concrete
Dry-pour QUIKRETE Fast-Setting in layers, soaking each with water per the bag’s directions. Stop a few inches below grade, then crown the top so rain sheds away from the wood.
6. Wait, then drill
Wait at least overnight — longer is better — then drill your eye-bolt hole, brush the hole and any cut ends with Copper-Green Brown, and install your hardware.
Real-World Scenarios: Matching the Build to Your Yard
The “best” hammock posts diy setup depends heavily on who’s hanging, where, and how often. Here are three realistic profiles with reasoning.
Profile 1: The weekend napper in the Midwest
Budget around $250, one adult, a cotton spreader-bar hammock, used a few times a week from May to September. The priority is simplicity. Two 10-foot 6×6 posts set 42 inches deep (Midwestern frost lines often run deep), the Vivere Chain Hanging Kit for easy height tuning, and QUIKRETE Fast-Setting for a one-day install. The chain’s adjustability forgives small measuring errors — exactly what a first-timer needs.
Profile 2: The coastal family in Florida or the Carolinas
Budget closer to $350, two kids who treat the hammock like a trampoline, salt air year-round. Corrosion and dynamic loads are the enemies. Here, the Abimars M10 316 Stainless Eye Bolts beat zinc hardware for longevity, but because kids bounce and pile in, consider the Koch 105140 through-bolts for maximum margin, with the stainless bolts reserved for a sunshade ridgeline. Sandy soil means going deeper than the minimum and using more concrete.
Profile 3: The hammock camper practicing at home
Budget around $200, a gathered-end camping hammock, daily use as a backyard test rig. Gathered-end hammocks hang with more sag and need wider spacing (often about 15 feet). Strap-friendly posts — no bolts at all — can work too: tree straps wrapped around 6×6 posts avoid drilling entirely. Treat every cut end with Copper-Green Brown since this setup sees year-round weather exposure.
Problem → Solution: Fixing the 4 Most Common Hammock Post Failures
Even well-built posts can develop issues. Here’s how to diagnose and fix them.
Problem 1: Posts lean inward toward each other. This usually means the holes were too shallow or the soil is soft. Solution: Add a horizontal crossbeam between post tops (turning the pair into a rigid frame), or add a diagonal backstay on the outside of each post. For new builds, go deeper and wider, and pre-lean posts slightly outward.
Problem 2: The base of the post is rotting. The classic culprit is a concrete collar that traps water against the wood, or untreated cut ends. Solution: Crown the concrete top, keep soil from piling against the post, and brush Copper-Green Brown onto any exposed wood. If rot is already soft to a screwdriver, the post needs replacing.
Problem 3: The eye bolt is loosening or bending. Screw-in bolts loosen when pilot holes are oversized; any bolt bends when loaded at extreme angles. Solution: Upgrade to a through-bolt like the Koch 105140 with a large washer, and position the bolt so it points toward the hammock, minimizing off-axis pull.
Problem 4: The hammock hangs too low or too high. Posts are set; you can’t move them. Solution: Adjustable chain (like the Vivere Chain Hanging Kit) or adjustable tree straps let you fine-tune height without new holes.
How to Choose Materials for Hammock Posts DIY
Choosing materials for hammock posts diy comes down to seven decisions, in this order:
- Pick ground-contact lumber. Look for pressure-treated posts labeled for ground contact (AWPA UC4A or, better, UC4B). Above-ground-rated lumber rots quickly in soil.
- Size up the post. A 4×6 (oriented with the 6-inch side toward the hammock) is a practical minimum; a 6×6 adds stiffness and looks more substantial.
- Buy length for depth. Aim to bury roughly a third of the post’s total length; for 6–7 feet above ground, that means 10- or 12-foot posts.
- Choose your anchor. Fast-setting concrete for speed, standard mix for longer working time, or compacted gravel if you want the option to remove the posts later.
- Match hardware to load. Through-bolts for heavy or two-person use; rated screw-in eye bolts for single users; chain kits for easy adjustment.
- Match hardware to climate. Hot-dipped galvanized or 316 stainless outdoors — never bright zinc-plated bolts from a junk drawer.
- Plan to seal. Budget for an end-cut preservative from day one.
Hammock Post Depth and Spacing: The Numbers That Matter
Hammock post depth and hammock post spacing are the two measurements you can’t fix later, so they deserve their own section.
Depth
Common guidance from builders and hammock retailers lands on a minimum of about 36 inches in concrete, with 40–48 inches favored in soft soil or cold climates. Your local frost line matters: if concrete sits above it, frost heave can gradually lift and tilt posts. Check with your local building department — they’ll know the frost depth for your county. A handy rule of thumb puts the buried portion at roughly one-third to one-half of the post’s above-ground height.
Spacing
Spacing depends on hammock type:
- Spreader-bar hammocks: add about 2 feet to the hammock’s overall length (including end loops).
- Gathered-end/camping hammocks: 14–16 feet is a common sweet spot, with around 15 feet often cited.
Hang height and angle
For gathered-end hammocks, the widely recommended 30-degree suspension angle balances comfort and stress. Flatter angles look sleek but multiply the tension dramatically: at 15 degrees, line tension climbs to nearly twice the occupant’s weight. That’s why tall hang points and proper sag protect your posts, not just your back.
Best Wood for Hammock Posts: 4×4 vs 4×6 vs 6×6
Choosing the best wood for hammock posts means balancing stiffness, appearance, cost, and handling weight. Here’s how the three common sizes compare (actual dimensions shown, since nominal lumber is smaller than its name).
| Post Size (actual) | Stiffness Under Side Load | Handling | Look | Best for |
|---|---|---|---|---|
| 4×4 (3.5″ x 3.5″) | Lowest — can flex at 6+ ft heights | Easiest to carry alone | Slim, fence-like | Kids’ hammocks, low hang points |
| 4×6 (3.5″ x 5.5″) | Good when 6″ face points at hammock | Moderate | Clean, modern | Budget builds with Koch 105140 bolts |
| 6×6 (5.5″ x 5.5″) | Highest — resists bending both ways | Heavy; two-person job | Substantial, pergola-like | Two-person hammocks, long spans |
Looking at the table, the 4×6 is the quiet overachiever: oriented correctly, it resists bending in the direction that matters at a lower cost than a 6×6. The 6×6 wins when you want visual heft or expect heavy, bouncy use. The 4×4 is only sensible for light loads and short posts, which is why forum builders who try it often report flex.
Species matters less than treatment rating in most US regions: pressure-treated Southern yellow pine dominates the East and South, while treated Douglas fir or hem-fir is more common out West. Cedar and redwood look beautiful but typically aren’t rated for ground contact unless treated.
DIY Hammock Posts vs Steel Hammock Stands
Should you pour concrete at all? Diy hammock posts and freestanding steel stands solve the same problem very differently.
| Factor | DIY Posts (in concrete) | Steel Hammock Stand | Trees |
|---|---|---|---|
| Stability | Excellent once cured | Good; relies on base footprint | Excellent if trees are healthy |
| Portability | Permanent | Movable, sometimes foldable | None |
| Hammock compatibility | Nearly any type/length | Limited to stand’s length range | Depends on tree spacing |
| Aesthetics | Can blend with pergolas, lights, shade sails | Utilitarian | Natural |
| Best for | Dedicated backyard spots | Renters, patios, seasonal use | Lucky yards |
Looking at this comparison, posts win on flexibility: they accept almost any hammock and double as supports for string lights or a shade sail. Steel stands win on portability, which makes them the better answer for renters. Trees are ideal only when they’re mature, healthy, and correctly spaced — and when you protect the bark with wide straps.
There’s also a hybrid option: one post plus one tree. It works, but forum builders note that a lone post facing a tree takes all the lean pressure, so go deeper or add a backstay.
Common Mistakes to Avoid When Building Hammock Posts DIY
Most hammock posts diy failures trace back to a handful of avoidable errors:
- Going too shallow. Two feet feels like plenty until the first summer storm softens the soil. Hit 36 inches minimum.
- Using above-ground lumber. It’s cheaper and it looks identical at the store. It will also rot at the ground line within a few seasons.
- Trusting mystery hardware. A bare hook from a junk drawer has no known rating. Buy hardware with a published working load limit, like the Koch 105140 or Abimars M10.
- Rushing the cure. “Sets in 40 minutes” does not mean “holds two bouncing adults in 40 minutes.”
- Forgetting the cut ends. Every hole you drill is a door for rot. Brush it with Copper-Green Brown.
- Hanging too flat. A tight, flat hammock multiplies stress on every component.
- Skipping the second level check. Check plumb after every concrete layer, not just once.
Long-Term Cost and Maintenance of Hammock Posts DIY
A hammock posts diy project looks cheap on day one and even cheaper over a decade — if you maintain it. Here’s a realistic total-cost-of-ownership view.
| Item | One-Time Cost (approx.) | 10-Year Maintenance | Best for |
|---|---|---|---|
| Two 10–12 ft treated 6×6 posts | Roughly $80–$160 | Low with sealing | Everyone |
| QUIKRETE Fast-Setting (8–10 bags) | Roughly $80–$150 | None | Fast installs |
| Fiskars 60″ Steel Posthole Digger | Around $50–$80 | None; reusable | Owners with future projects |
| Hardware (Koch 105140 or Vivere Chain Hanging Kit) | Around $20–$50 | Occasional inspection | Every build |
| Copper-Green Brown | Around $15–$30 | Recoat cut areas every few years | Longevity |
Looking at the totals, most builds land roughly between $250 and $450 including tools — often less than a quality steel stand, while lasting longer if the posts stay dry at the base. The Fiskars 60″ Steel Posthole Digger is the only line item with resale-like value, since it’ll serve fence and mailbox projects later.
Maintenance schedule
- Every spring: Inspect eye bolts for rust or bending; tighten nuts; check plumb with the Johnson Level 175-O.
- Every 2–3 years: Recoat exposed end grain and bolt holes; clear soil and mulch away from the post base.
- As needed: Lubricate chain links; replace fraying suspension ropes immediately.
With this routine, well-drained ground-contact posts commonly last a decade or more.
Safety, Regulations, and Standards
A hammock is low-slung, but a failure still drops an adult onto the ground — sometimes onto a concrete crown. A few safety standards and rules deserve attention.
Call 811 first. The national call-before-you-dig number is free, and many states legally require it before excavation. Utility lines can sit just inches below the surface.
Lumber ratings. The American Wood Protection Association (AWPA) use categories tell you where treated wood can go. For posts in the ground, look for ground-contact ratings on the end tag (UC4A general, UC4B heavy-duty).
Preservatives. Consumer end-cut treatments like Copper-Green Brown rely on copper naphthenate, a preservative long used on utility poles and fence posts and valued for its relatively low mammalian toxicity. Still, read and follow the label: wear gloves, ventilate, and keep it away from kids and pets.
Hardware ratings. Working load limits assume in-line pulls and a safety factor. Stay well below ratings, especially with off-axis angles or multiple occupants.
Local rules. HOAs and some municipalities regulate permanent backyard structures or setbacks from property lines. A quick check with your HOA or building department avoids a removal notice later.
Kids. Supervise young children, keep hang heights modest, and avoid placing posts over hard surfaces.
FAQ About Hammock Posts DIY
❓ How much does it cost to build hammock posts diy?
❓ Can I use 4x4 posts for a hammock?
❓ Do hammock posts need concrete?
❓ What is the best hardware to buy for hammock posts?
❓ How long do DIY hammock posts last?
Conclusion: Build It Once, Relax for Years
A great hammock posts diy build isn’t complicated — it’s just unforgiving of shortcuts. Dig deeper than feels necessary with the Fiskars 60″ Steel Posthole Digger. Keep everything plumb with the Johnson Level 175-O. Anchor with QUIKRETE Fast-Setting and give it real curing time before anyone climbs in. Then choose your hang point based on who’s using it: the Koch 105140 for maximum margin, the Abimars M10 316 Stainless Eye Bolts for salty or humid climates, or the Vivere Chain Hanging Kit for effortless height adjustment. Finish by sealing every cut and hole with Copper-Green Brown, and your posts will outlast most of the hammocks you’ll hang on them.
The underlying lesson: a hammock pulls sideways with roughly the full weight of its occupant on each post. Respect that force — with depth, drainage, rated hardware, and a sensible hang angle — and you’ll have a backyard retreat that stays straight season after season.
So pick your spot, call 811, and schedule that build for this weekend. Your future self, swaying gently in the shade with a cold drink, will thank you.
🌿 Ready to build your backyard escape?
🛠️ Grab the essentials above and turn an empty corner of your yard into your favorite place to unwind. Click any highlighted product to check current pricing and availability — and start building hammock posts that last for years!
Recommended for You
- Hammock Weight Limit: 7 Best Heavy-Duty Picks for 2026
- Hammock Bug Net and Rain Fly: 7 Best Combos for 2026
- Hammock With Bug Net and Rainfly: 7 Best Picks for 2026
Disclaimer: This post contains affiliate links. As an Amazon Associate, I earn from qualifying purchases made through these links, at no additional cost to you.
✨ Found this article helpful? Share it with someone who needs it! 💬🤗