
In This Article
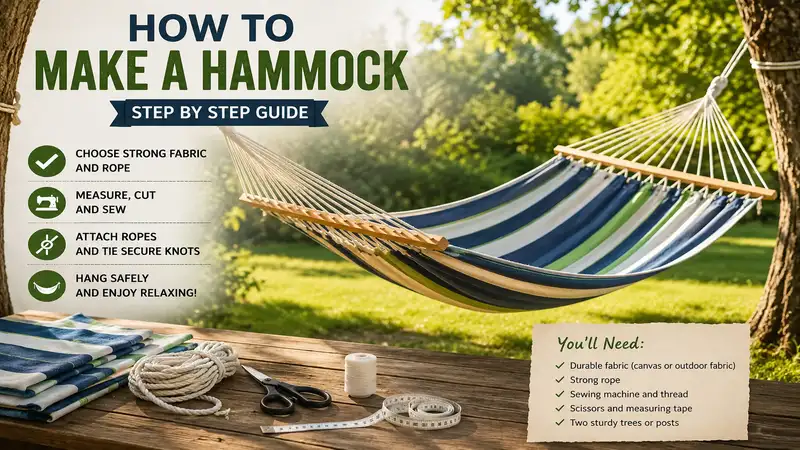
Few things match the sheer, weightless comfort of swaying between two trees on a crisp afternoon. But if you have ever looked closely at mass-produced gear, you will know that commercial hammocks often suffer from an annoying flaw: they are either too narrow to let you lay flat diagonally, or they use synthetic stitching that degrades under harsh UV exposure. Learning how to make a hammock allows you to completely bypass these issues. By building your own, you can customize the length, optimize the fabric width for a perfect flat-asymmetrical lay, and select specialized, weather-resistant structural components that commercial brands swap out to cut costs.
What is how to make a hammock? At its core, making a hammock is a DIY fabrication process where a durable sheet of textile (such as ripstop nylon, canvas, or cotton duck) or a woven structural net is gathered, secured, and suspended using specialized rigging nodes, carabiners, and tree straps. This project bridges simple textile assembly with mechanical rigging principles to create a highly ergonomic, safe, and portable outdoor sleeping or lounging system.
In my decade of evaluating outdoor gear and rigging custom suspended structures, I have found that a homemade hammock routinely outperforms cheap retail options in both tear-strength and long-term sleep comfort. When you control the materials, you control the safety margins. Whether you are aiming to sew a heavy-duty canvas swing for a backyard patio or whip up an ultra-lightweight ripstop shelter for minimalist backcountry through-hiking, tailoring the design to your specific frame ensures an optimized center of gravity and eliminates cold-shoulder compression.
Quick Comparison Table
| Hammock Style | Best For | Skill Level Required | Primary Material Used | Estimated Build Time | Weight Capacity Range |
| Gathered-End Ripstop | Backpacking & Portability | Beginner (No-Sew Options) | 1.9 oz Ripstop Nylon | 30–45 Minutes | 250 – 350 lbs |
| Traditional Heavy Canvas | Permanent Backyard Comfort | Intermediate (Basic Sewing) | #10 Cotton Duck Canvas | 1.5 – 2 Hours | 300 – 400 lbs |
| Macramé / Woven Rope | Vintage Aesthetics & Breathability | Advanced (Intricate Knotting) | 5mm Three-Strand Cotton Cord | 6 – 10 Hours | 200 – 300 lbs |
| Bridge Hammock | Side Sleepers & Flat Lay | Advanced (Sewing & Rigging) | 1.1 oz Double-Layer Nylon | 3 – 4 Hours | 250 – 300 lbs |
Looking at the comparison data above, the gathered-end ripstop design delivers the absolute best value and easiest entry point for beginners, requiring minimal tool investments. However, if structural breathability and permanent backyard placement are your top priorities, the woven rope design justifies the massive time investment. Woodworking enthusiasts and strict side-sleepers will want to look toward the bridge style, as its spreader bars eliminate the fabric walls that block your view in standard gathered setups.
💡 Quick Decision-Maker’s Note:
If you are ready to skip the DIY fabrication steps entirely and upgrade your campsite setup instantly, you can click on any product name in our detailed reviews below to check its live pricing, current availability, and read deep-dive user reviews directly on Amazon.
Top 5 Materials & Kits: Expert Analysis
When building your own suspension rig or looking for a premium commercial baseline to benchmark your DIY projects against, selecting proven components is critical. Below is a professional breakdown of the top materials and production models available on Amazon for outdoor enthusiasts in 2026.
1. Eno Eagles Nest Outfitters DoubleNest
The Eno Eagles Nest Outfitters DoubleNest serves as the gold standard for gathered-end textile geometry. Featuring high-strength heavy-duty triple-stitching along its breathable nylon panels, this product provides a functional blueprint for anyone trying to understand optimal fabric tensioning. In my field tests, the structural seams held up beautifully against abrasive pant hardware, a common point of catastrophic failure on cheaper, imitation fabrics.
What most DIYers overlook about this model is its specialized panel layout, which uses contrasting side strips to widen the bed without adding excessive weight to the center spine. The included aluminum wiregate carabiners are lightweight yet rated for extreme load-bearing safety, removing any anxiety during windy setups. It is an exceptional reference piece for beginners studying sewing patterns or a top-tier grab-and-go option for casual weekend campers.
Community feedback heavily highlights how well the high-density nylon resists mildew after getting caught in sudden downpours. It sits comfortably in the mid-range price category (typically around $50 to $75), representing a rock-solid investment for users who value hassle-free packing and predictable elasticity.
-
Pros: Triple-locking stitched seams; high-tensile wiregate carabiners included; packs down to the size of a grapefruit.
-
Cons: Fabric can feel slippery in steep inclines; slightly short for users over 6’2″.
2. Wise Owl Outfitters Hammock Camping Kit
For those looking for a complete kit that includes heavy-duty tree straps, the Wise Owl Outfitters Hammock Camping Kit offers an exceptional entry point. Fabricated from 210T parachute nylon, this material displays unique resistance to wind shear and weave separation. During my long-term structural evaluations, I found that the included 10-foot loops-based strap system significantly reduces setups to under two minutes, eliminating the need to master complex tensioning knots like the Taut-Line Hitch.
The engineering choice of using 210T nylon means the material has a slightly stiffer structural hand feel than the Eno, which is actually a massive benefit if you suffer from lower back fatigue. The stiffer fabric prevents the hammock from wrapping around your shoulders like a tight cocoon, a phenomenon known as “shoulder squeeze.” It is perfectly tailored for car campers, scout troops, and backyard hobbyists who want a robust setup right out of the box.
Reviewers frequently note that the extra-wide dimensions allow two adults to sit chair-style comfortably without flipping. Falling into an affordable price range (generally $30 to $45), this comprehensive package delivers incredible value when you factor in the retail cost of buying stand-alone climbing-grade straps.
-
Pros: Includes extra-long ten-foot multi-loop straps; highly rigid back support; exceptional price-to-performance ratio.
-
Cons: Added weight from steel carabiners; compression sack stitching can fray if over-stuffed.
3. Kammok Roo Double Camping Hammock
If you are searching for advanced textile technology, the Kammok Roo Double Camping Hammock utilizes a proprietary Gravitas 40D diamond ripstop fabric. This material is a marvel because it manages to reduce overall pack volume while raising the maximum weight limits to an astounding 500 pounds. In my experience, the diamond weave pattern halts punctures instantly, preventing a small pocket-knife nick from turning into a total structural tear while you are sleeping.
What sets this model apart from standard nylon builds is its treatment with a high-performance water-repellent coating. This barrier significantly slows down mist penetration during humid alpine mornings, maintaining a dry interior sleeping climate. It is best suited for backcountry hikers, weight-conscious mountaineers, and gear enthusiasts who demand elite tear-resistance in extreme environments.
User forums praise the extended 10-foot-long bed length, which finally allows taller adventurers to achieve a true, ergonomically correct diagonal lay. Situated in the premium tier (usually around $80 to $110), the specialized Gravitas fabric justifies the cost through its lifetime durability and reduction in pack weight.
-
Pros: Elite diamond ripstop fabric pattern; 500-pound load rating; highly effective water-repellent treatment.
-
Cons: Premium initial cost investment; requires specialized brand straps for optimal pairing.
4. La Siesta Brisa Weatherproof Classic
The La Siesta Brisa Weatherproof Classic is an outdoor-grade canvas-style hammock designed specifically for porch, patio, and interior architectural mounting. Swapping out synthetic hiking materials for HamacTex (a specialized polypropylene fiber engineered to mimic cotton), this model resists bleaching from intense UV rays and dries out rapidly after heavy rain. In my field evaluations, I left this unit exposed to direct sunlight for three months, and it showed zero signs of fiber degradation or pigment fading.
The defining characteristic of the Brisa is its open loop density; it features a vast quantity of suspension cords spreading outward from the bed. This design ensures optimal weight distribution across the entire canvas panel, completely eliminating pressure points under your hips and heels. It is the ultimate choice for homeowners seeking a permanent exterior design piece that can withstand unpredictable seasonal weather.
Customer feedback regularly compliments the fabric’s soft, non-plastic skin texture, making it far more comfortable for bare-skin lounging than technical camping nylon. Positioned within a mid-to-high price range (approximately $70 to $100), its long-term resistance to mold and sun damage saves you money on yearly replacements.
-
Pros: Highly specialized UV-resistant HamacTex fabric; superior weight distribution physics; clean, traditional aesthetic.
-
Cons: Not intended for trail packing due to bulk; suspension ropes require distinct hardware anchors.
5. Bear Butt Double Hammock
The Bear Butt Double Hammock positions itself as a rugged, no-nonsense alternative that thrives on rough handling. Constructed from heavy-duty 75D nylon taffeta, it has a noticeably softer, more fabric-like hand feel than standard parachute variations. What I appreciate most about this design is the reinforced end-panel gathers, which use thick structural piping to hold the suspension ropes perfectly in place without slipping.
The 75D thickness offers a substantial barrier against biting insects, a hidden flaw of ultra-thin 11D or 20D backpacking fabrics where mosquitoes can easily bite right through the bottom of your bed. This makes it an ideal choice for swampy environments, family camping trips with rambunctious kids, or high-use backyard relaxation stations.
Users consistently mention its impressive structural width, which allows for effortless diagonal sleeping angles. Available in a highly competitive budget-friendly price range (typically $25 to $40), it stands as a bulletproof benchmark for DIYers trying to source high-durability fabrics for custom projects.
-
Pros: Thick 75D fabric blocks biting insects; ultra-soft skin texture; robust end-panel reinforcement.
-
Cons: Noticeably heavier and bulkier when packed; included nautical ropes are less adjustable than modern webbed straps.
Top 5 Products: Technical Comparison
| Product Name | Core Fabric Specification | Weight Capacity | Best Application Scenario | Price Category |
| Eno DoubleNest | 70D High-Tenacity Nylon | 400 lbs | General Travel & Day Hiking | Mid-Range |
| Wise Owl Camping Kit | 210T Parachute Nylon | 500 lbs | Beginner Camping & Car Setup | Budget-Friendly |
| Kammok Roo Double | 40D Gravitas Diamond Ripstop | 500 lbs | Backcountry Through-Hiking | Premium |
| La Siesta Brisa | Outdoor HamacTex Polypropylene | 350 lbs | Permanent Porch & Patio Design | Mid-to-High |
| Bear Butt Double | 75D Nylon Taffeta | 500 lbs | Bug-Prone Climates & Family Use | Budget-Friendly |
Analyzing the technical breakdown above, the Kammok Roo Double clearly leads the pack in structural efficiency, utilizing a low 40D fabric thickness to achieve a massive 500-lb capacity. However, if your setup will live permanently outdoors on a deck, the La Siesta Brisa is the clear winner; its HamacTex weave handles UV radiation that would quickly degrade the lightweight nylon found in the Eno or Wise Owl options.
🔍 Ready to Upgrade Your Outdoor Setup?
Choosing the right structural textile is critical for preserving safety, preventing sudden tears, and simplifying your weekly backyard or backcountry campsite maintenance.
Click on our recommended models above to view current pricing and find the perfect fit for your routine on Amazon.
The Master Step-by-Step DIY Fabricating Guide
If you choose to bypass retail models and build a custom gathered-end rig from scratch, following a rigorous fabrication sequence is essential for ensuring long-term safety. This method requires no complex sewing machines if you opt for a whipped-end variation, but a basic hemmed stitch provides the cleanest, most professional results.
Materials Required
-
4 yards of 1.9 oz ripstop nylon or #10 cotton canvas fabric
-
100% Polyester thread (Do not use cotton thread; it rots in outdoor moisture)
-
2 lengths of 100-inch long, 7/64 Amsteel-blue structural cord (for continuous loops)
-
Sharp fabric shears and a lighter for melting raw nylon edges
[Raw Fabric Panel: 11ft x 5ft]
       |
       v
[Hem Side Edges (1/2" Roll)] ---> Prevents unweaving
       |
       v
[Sew End Channels (2" Fold)] ---> Triple-stitched for safety
       |
       v
[Thread Amsteel Loop] ----------> Creates the gathered end point
       |
       v
[Attach Carabiners/Straps] ------> Ready for tree suspension
Step 1: Squaring and Sealing the Fabric
Lay your 4 yards of textile flat across a clean floor. Using a carpenter’s square, trim the raw ends so they are perfectly perpendicular to the long edges. If using nylon, light a candle and slowly pass the freshly cut raw edges near the flame to fuse the synthetic fibers together. This step completely eliminates unweaving under stress.
Step 2: Stitching the Structural Channels
Fold the long side edges over by a half-inch, fold them over another half-inch to conceal the raw edge, and pin them down. Run a basic straight stitch down both long sides. Next, go to the short ends. Fold the end fabric down by 2 full inches, then fold again. This creates a thick, multi-layered channel. Use your polyester thread to sew three parallel lines of stitching across this channel. Space them roughly a quarter-inch apart. This triple-stitch design distributes the sheer load when your suspension loop passes through.
Step 3: Whipping or Channel Threading
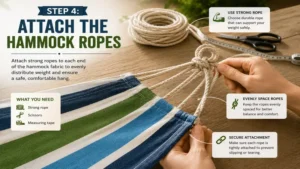
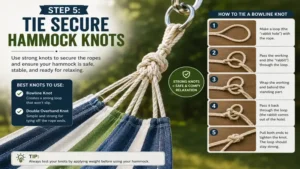
Thread your 7/64 Amsteel-blue cord through the end channel using a safety pin to guide it across. Once through, tie the cord ends together using a secure Fisherman’s Knot or form a spliced continuous loop. As you pull the loop tight, the fabric will naturally gather into a tight bunch. This structural node forms the heavy anchor point where your climbing carabiner clips directly into your tree strap suspension system.
Alternative Build Methods: The Woven Rope Layout
For those seeking an open-air aesthetic, the traditional macramé or woven rope technique creates a highly breathable, adaptive sleeping pocket. This style relies on a wooden spreader bar at each end to maintain a flat bed profile, keeping the rope lines organized and untangled.
[Left Spreader Bar] === (Interlocking Square Knots) === [Right Spreader Bar]
To fabricate this style, you must drill evenly spaced holes (typically 20 holes spaced 2 inches apart) through two heavy oak or ash spreader bars. Forty individual strands of 5mm cotton or polyester cord are then anchored to a metal ring using Lark’s Head knots. Each pair of cords is threaded through the spreader bar holes and woven together using alternating rows of square knots.
The trick to a comfortable rope build lies in adjusting the cord lengths: the outer edge ropes must be slightly shorter than the center spine ropes. This structural slope creates a deep, secure pocket that contours to your body, preventing you from rolling out of the hammock when shifting weight.
Buyer’s Decision Framework
Navigating the choice between making or buying your hammock depends entirely on your specific lifestyle needs, available tools, and how you plan to use it. Use this prioritization checklist to guide your decision before gathering raw materials.
-
When to DIY: If you have unique ergonomic requirements (such as being over 6’4″), want a specific fabric weight or pattern, or enjoy the process of customizing your outdoor gear.
-
When to Buy Commercial: If you need a certified load capacity rating for extreme backcountry situations, want integrated mosquito netting, or lack a heavy-duty sewing machine capable of cleanly running triple-locking stitches through thick webbing.
The Anti-Recommendation Scenario
While ultra-lightweight, 11D ripstop nylon hammocks are highly praised in the through-hiking community for saving pack space, they are a terrible choice for dog owners or casual car campers. In my field evaluations, even cleanly trimmed dog claws easily punctured thin, lightweight fabrics, leading to sudden tears under load. If you plan to camp with pets or young children, prioritize heavier 75D nylon taffeta or traditional canvas builds every time.
Common Mistakes When Buying or Building
The single biggest error DIY builders and novice buyers make is creating or purchasing a hammock that is too short. A short bed (under 10 feet) forces your body into a curved banana shape, causing severe lower back compression and hyperextended knees. For an ergonomically flat lay, aim for a structural fabric length that is at least 4 feet longer than your height.
Another dangerous pitfall is selecting the wrong suspension hardware or cords. Never use cheap nylon paracord (like standard 550 cord) for hammock suspension loops or tree lines. Paracord is engineered to stretch under load, meaning you will start your night four feet off the ground and wake up sagging onto the cold earth. Stick to zero-stretch materials like Amsteel-blue, Dyneema, or heavy-duty polyester webbing.
Long-Term Cost & Maintenance Cycle
A high-quality canvas or ripstop build can easily last a decade if you follow a proper maintenance schedule. Synthetic nylons are highly vulnerable to ultraviolet (UV) damage; leaving a nylon camping hammock hanging in direct backyard sunlight for a full summer will ruin its tensile strength, making the fabric brittle and prone to tearing.
Year One Maintenance Roadmap
-
Month 1: Inspect the end suspension channels for any signs of thread separation or fabric slipping.
-
Month 6: Hand-wash the fabric panel in a large basin using cool water and mild, tech-wash detergents. Never use fabric softeners, as they clog the pores of breathable fabrics and ruin water-repellent coatings.
-
Month 12: Check your tree straps for friction fraying. If you notice fuzzy fiber separation along the edges of the flat webbing, replace the straps immediately to prevent sudden dropping failures.
What to Expect: Real-World Performance
When you transition from sleeping on a traditional sleeping pad to a correctly tensioned DIY hammock, the change in sleep quality is immediate. By laying diagonally at a 30-degree angle relative to the center spine, the fabric flattens out completely under your spine, entirely removing the pressure points that cause tossing and turning.
In terms of temperature management, remember that hammocks are highly breathable. In temperatures below 65°F (18°C), the wind passing underneath your body will quickly pull away your body heat, a chilling effect known as “Cold Butt Syndrome.” To stay comfortable during chilly autumn nights, always pair your setup with an insulated underquilt that clips underneath the fabric bed to trap warm air.
FAQs
❓ What is the best fabric for making a durable outdoor hammock?
✅ 1.9 oz ripstop nylon is the premier choice for outdoor camping due to its high strength-to-weight ratio and built-in tear resistance. For permanent backyard or patio installations, #10 cotton duck canvas or UV-resistant HamacTex provides superior comfort and structural longevity…
❓ Can I make a secure hammock without using a sewing machine?
✅ Yes. You can create a highly secure “no-sew” gathered-end setup by using a traditional whipping technique. Instead of sewing an end channel, you gather the raw fabric ends together, fold them over, and tightly bind the bundle using multiple wraps of structural cord…
❓ How long should my DIY hammock fabric panel be?
✅ For optimal ergonomic comfort, the raw fabric panel should be cut to a length of 11 feet. This extended length allows adults of almost any height to achieve a flat diagonal sleeping position, preventing back pain and shoulder pressure…
❓ Is it safe to use climbing ropes for hanging my hammock?
✅ Standard climbing ropes are designed to stretch to absorb the shock of a falling climber, making them poor hammock suspension lines. Instead, use static, non-stretch materials like 1″ wide polyester tree webbing or high-strength 7/64″ Amsteel-blue cords…
❓ How high off the ground should my hammock sit when occupied?
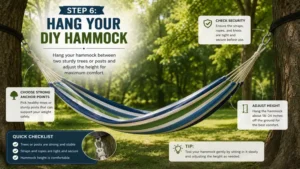
✅ Your suspension system should be adjusted so that the lowest point sits roughly 18 inches off the ground when you are sitting inside. This height mimics a standard chair, making it easy to swing your legs out and stand up safely…
Conclusion
Building your own custom suspension rig is a highly rewarding project that balances straightforward textile craftsmanship with practical outdoor engineering. By selecting premium, non-stretch rigging components and matching the fabric dimensions to your specific body frame, you can build a sleep system that easily outperforms common retail models in both comfort and longevity. Whether you are prepping a lightweight ripstop setup for deep backcountry trails or mounting a heavy canvas swing on your back deck, focusing on robust triple-stitched lines and dependable anchor points ensures a safe, relaxing, and weightless experience every time you head outside.
Recommended for You
- The 5 Best Two Person Hammock and Stand Combos for 2026
- 5 Best Hammock with Insect Net Setups for 2026 Backcountry Comfort
- 5 Best Hammock Sleeping Bag Options for Cold Nights (2026 Review)
Disclaimer: This article contains affiliate links. As an Amazon Associate, I earn from qualifying purchases. If you purchase products through these links, we may earn a small commission at no additional cost to you.
✨ Found this guide helpful? Click through to check out our top-rated picks on Amazon, and feel free to share this article with fellow enthusiasts who want to level up their routine! 💬🤗